
Last updated on November 10th, 2021
With an immense rise in awareness amongst common people about pollution of environment, now business owners are also listening to the problems and addressing them by creating eco-friendly products. In the graphic design field also, the demand for eco-friendly labels is increasing to make a good impact on the customers.
In this tutorial, you can learn how to create your own eco-friendly label that you can edit as well. Before going to brief about tutorial you should have to open a new document and use of eclipse tool with dimensions where we will use to create an eco-friendly vector label design.
Now lets know That How To Design An Eco-friendly Vector Label
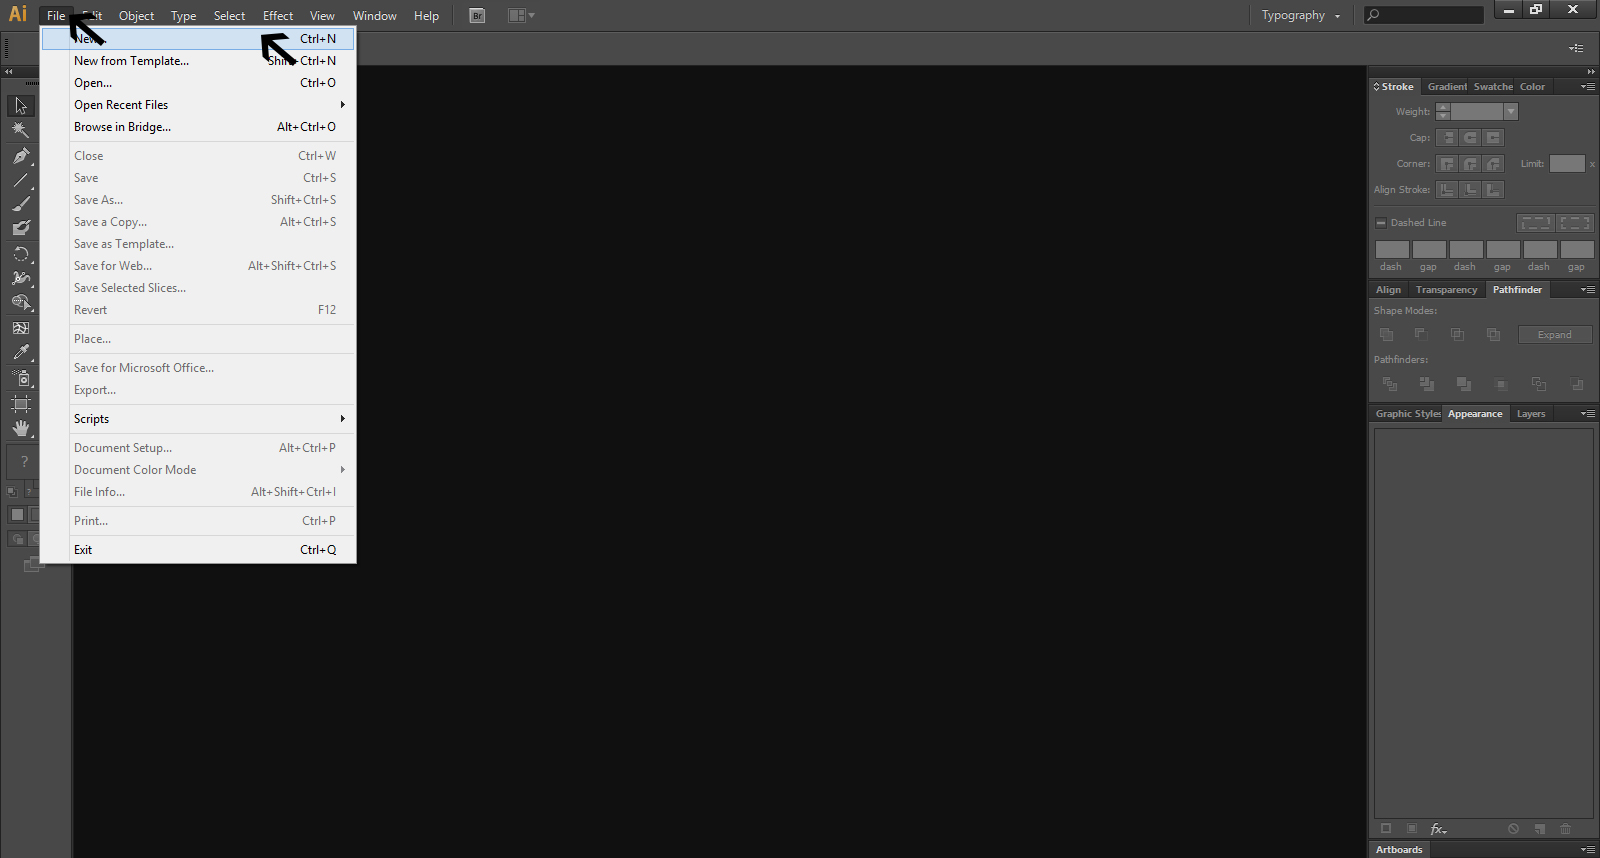
Select File menu and then click on New
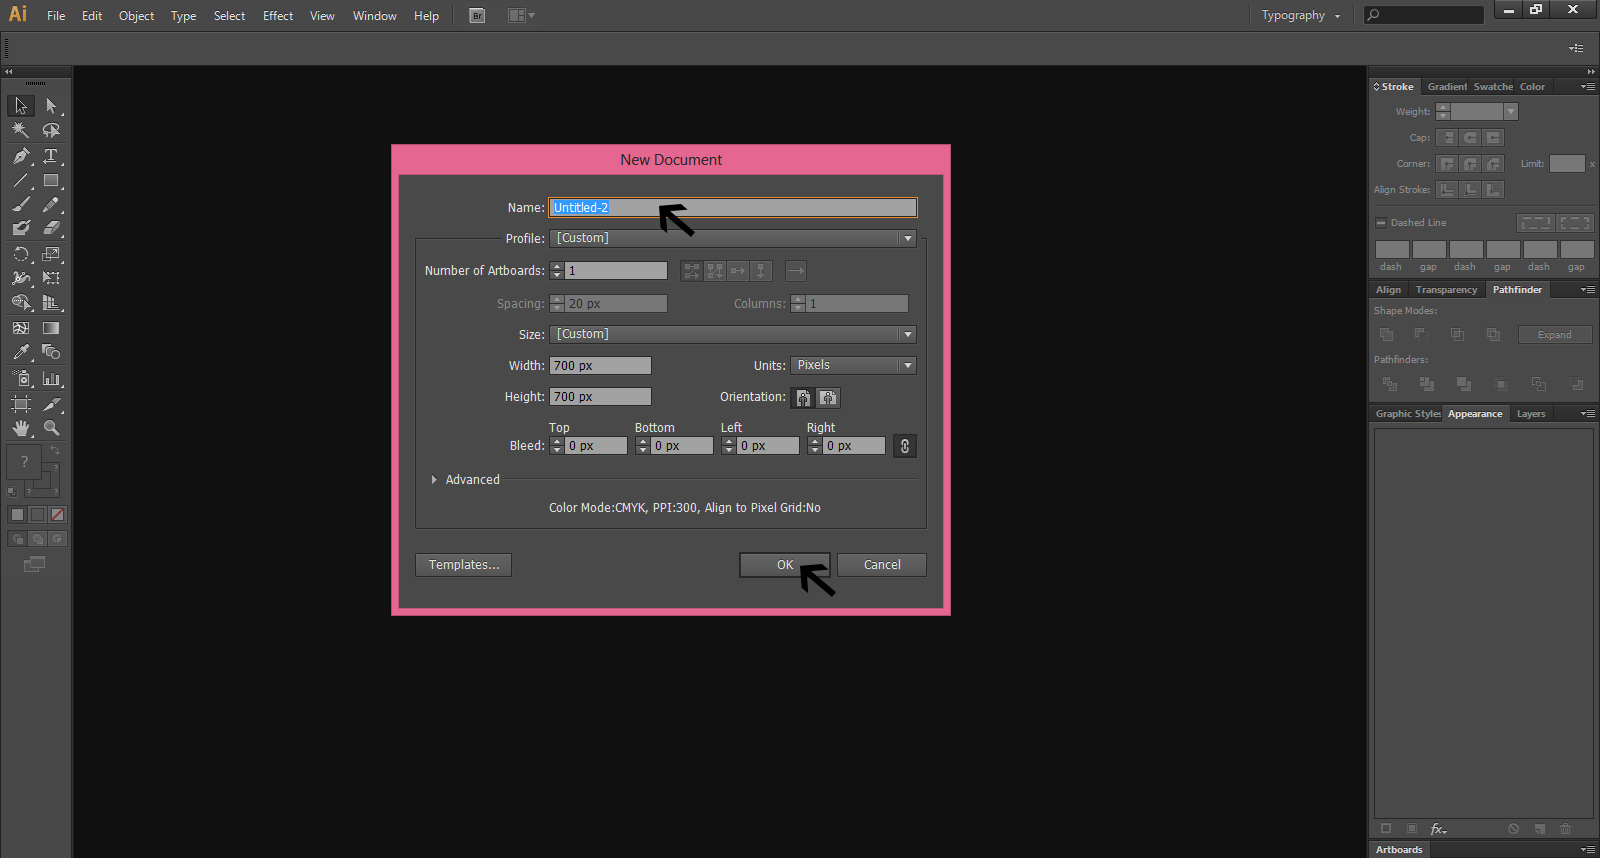
Get New Document and give it a name and click OK
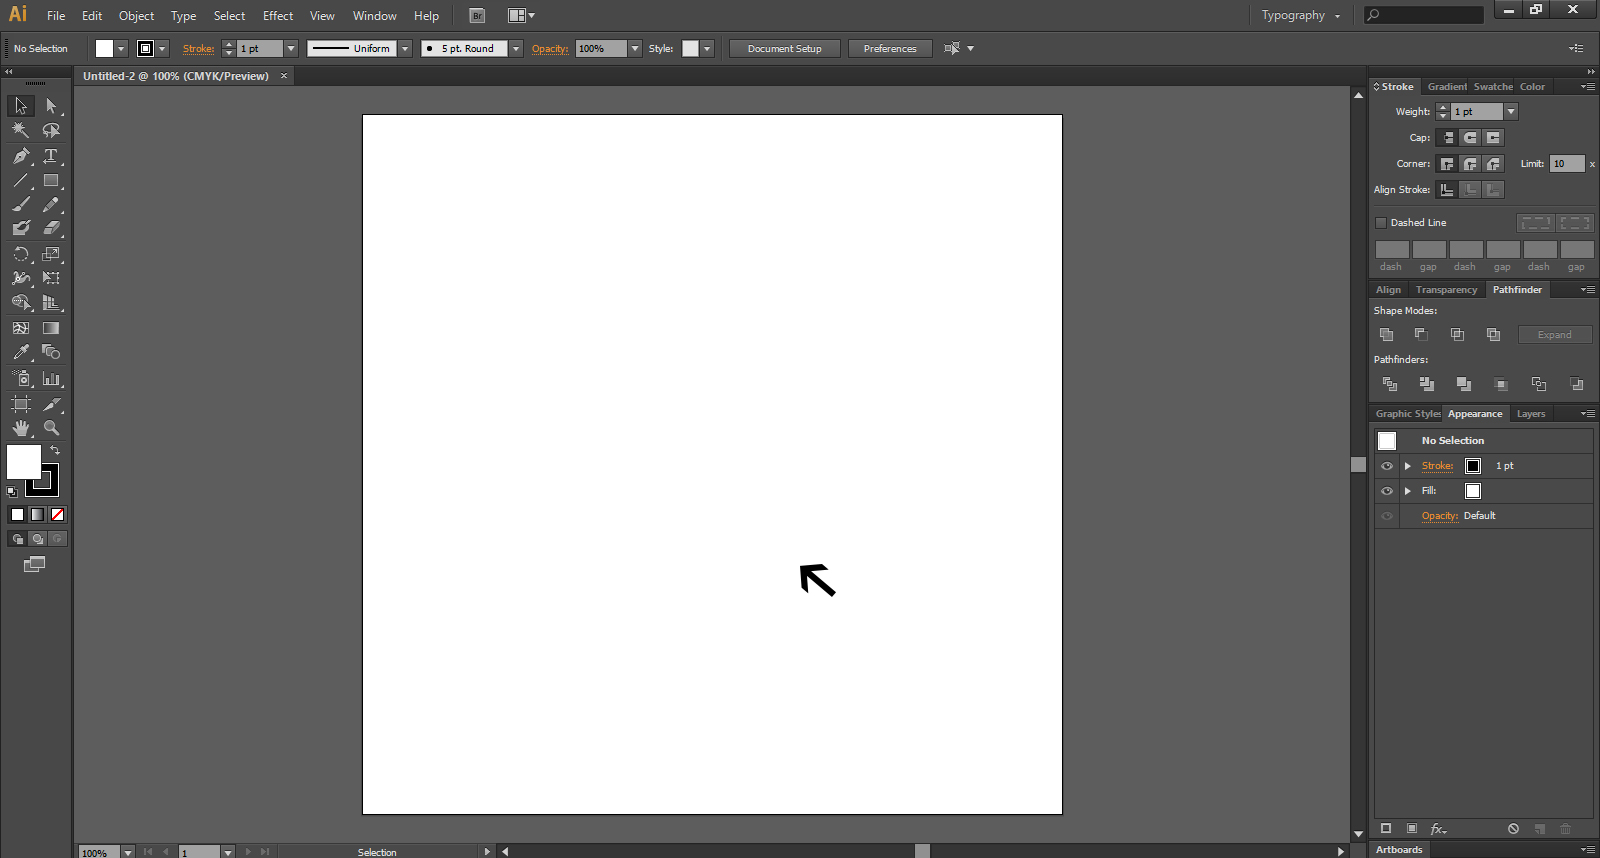
You got the document to work on
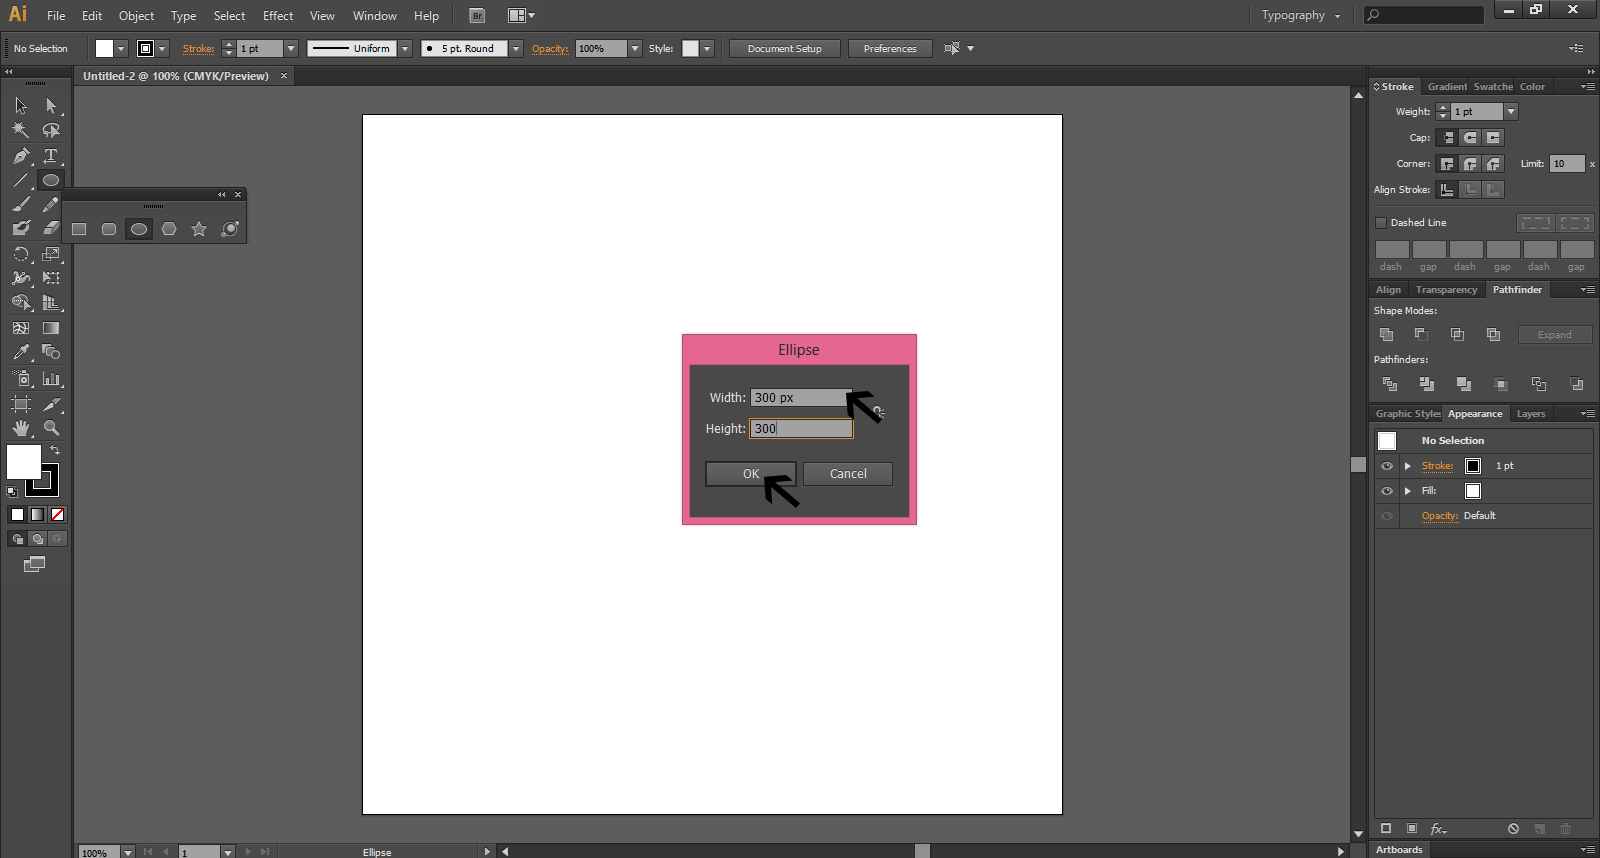
Get Ellipse tool and fix the Width and Height of your requirement
Here we will explain it to start eco-friendly vector label step by step so that you can get clear ideas:
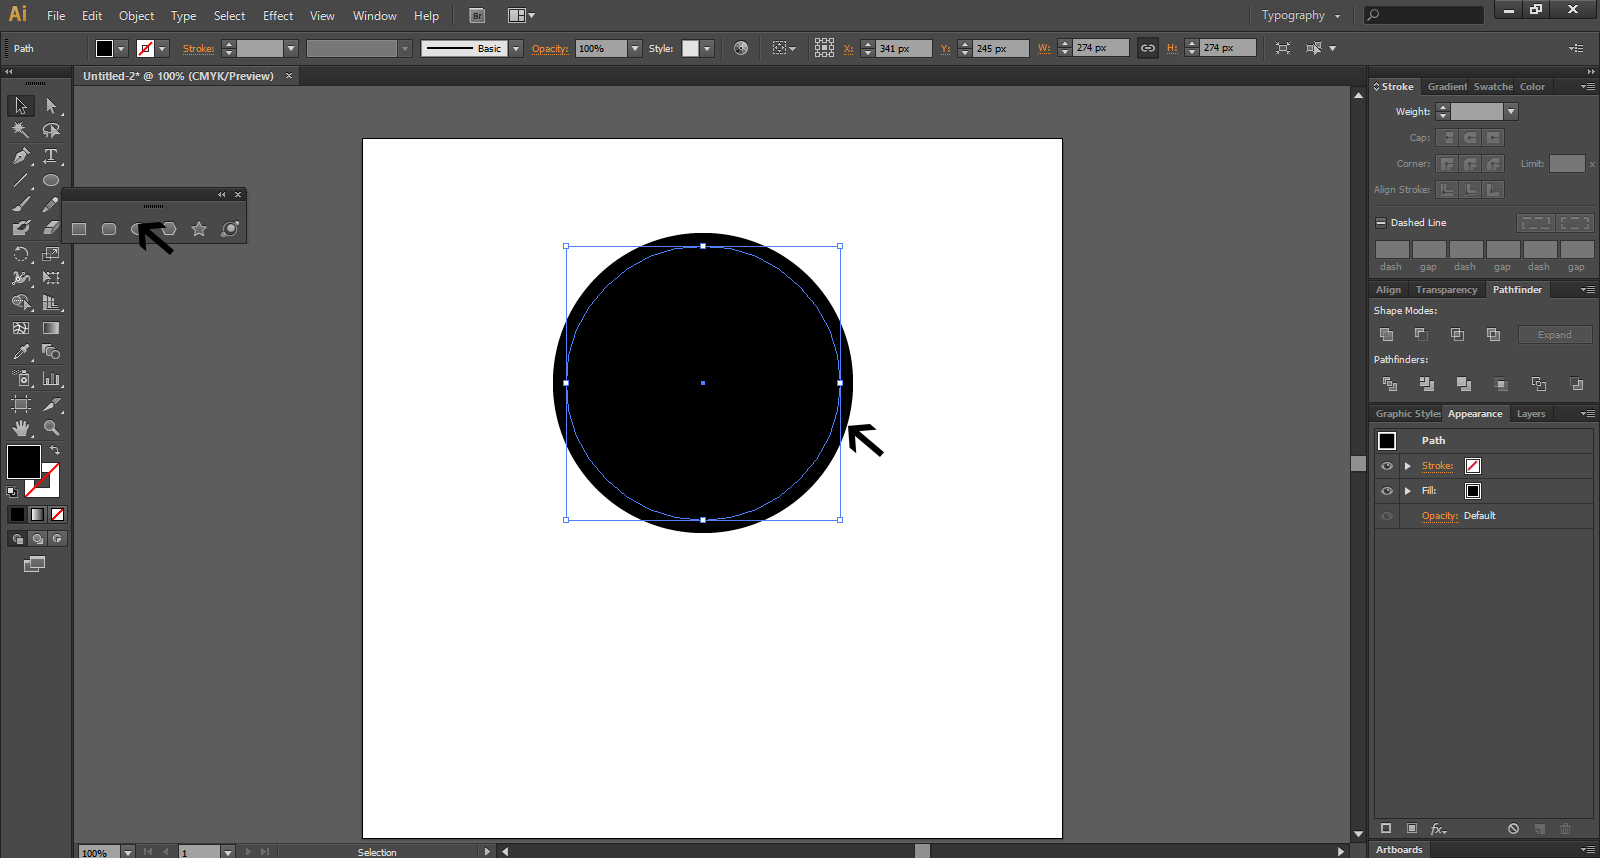
Step-1
The first step you take is to use the Ellipse Tool and draw a circle. You should try to get a perfect circle. To ensure that, hold Shift key while drawing the circle. Or, you can click once and enter the dimensions of your choice. Then, you can fill the circle with color of your preference.
Step-2
After you have selected the circle, you should go to OBJECT> OFFSET PATH.
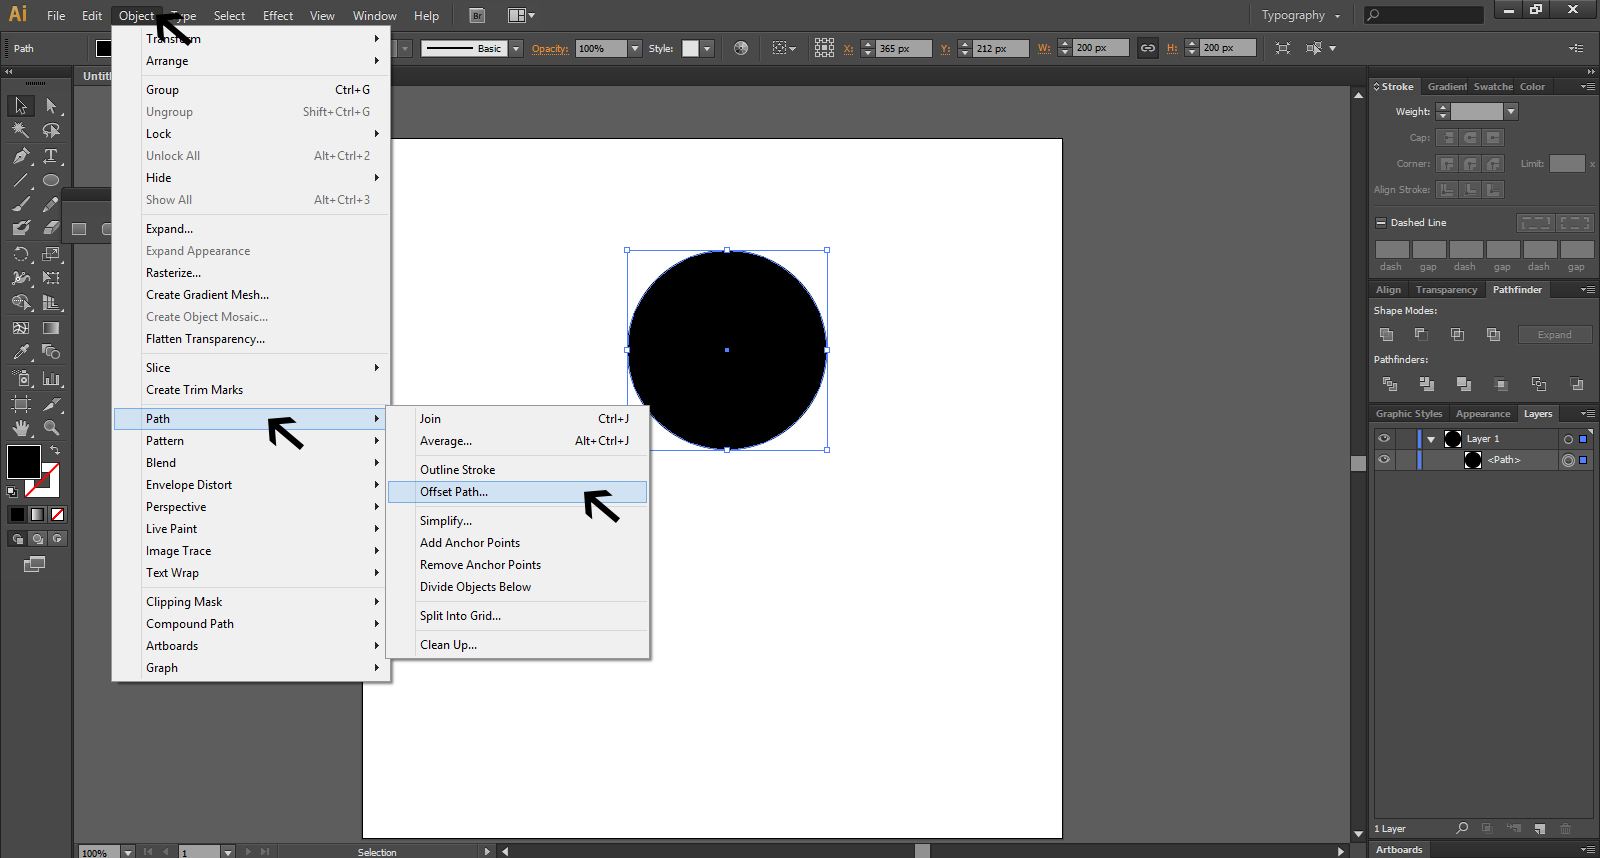
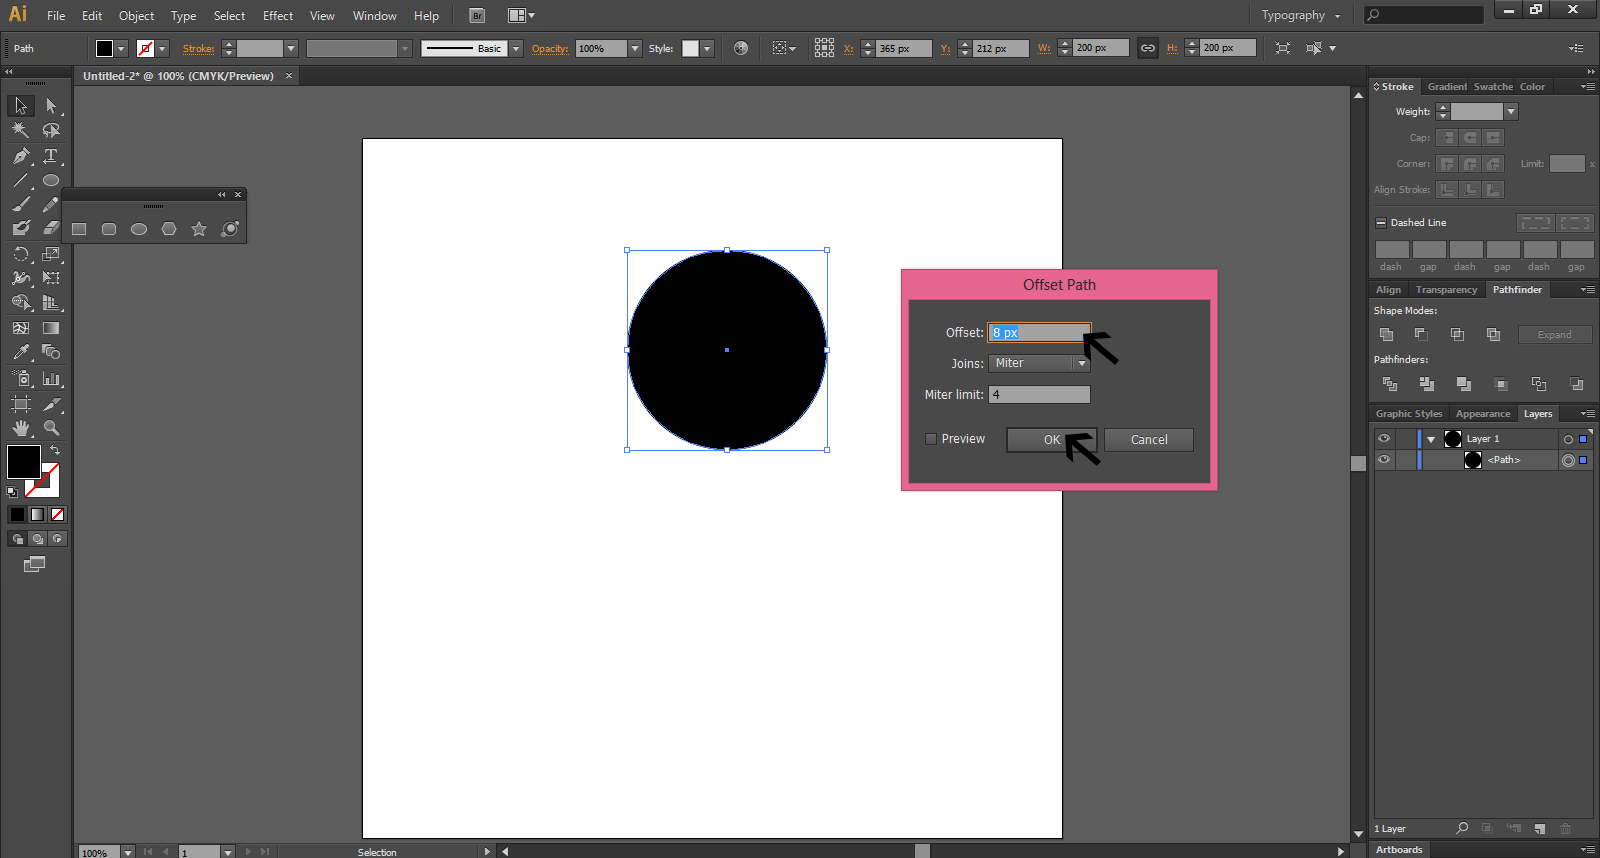
Step-3
Then, adjust to get a slightly offset circle and click OK.
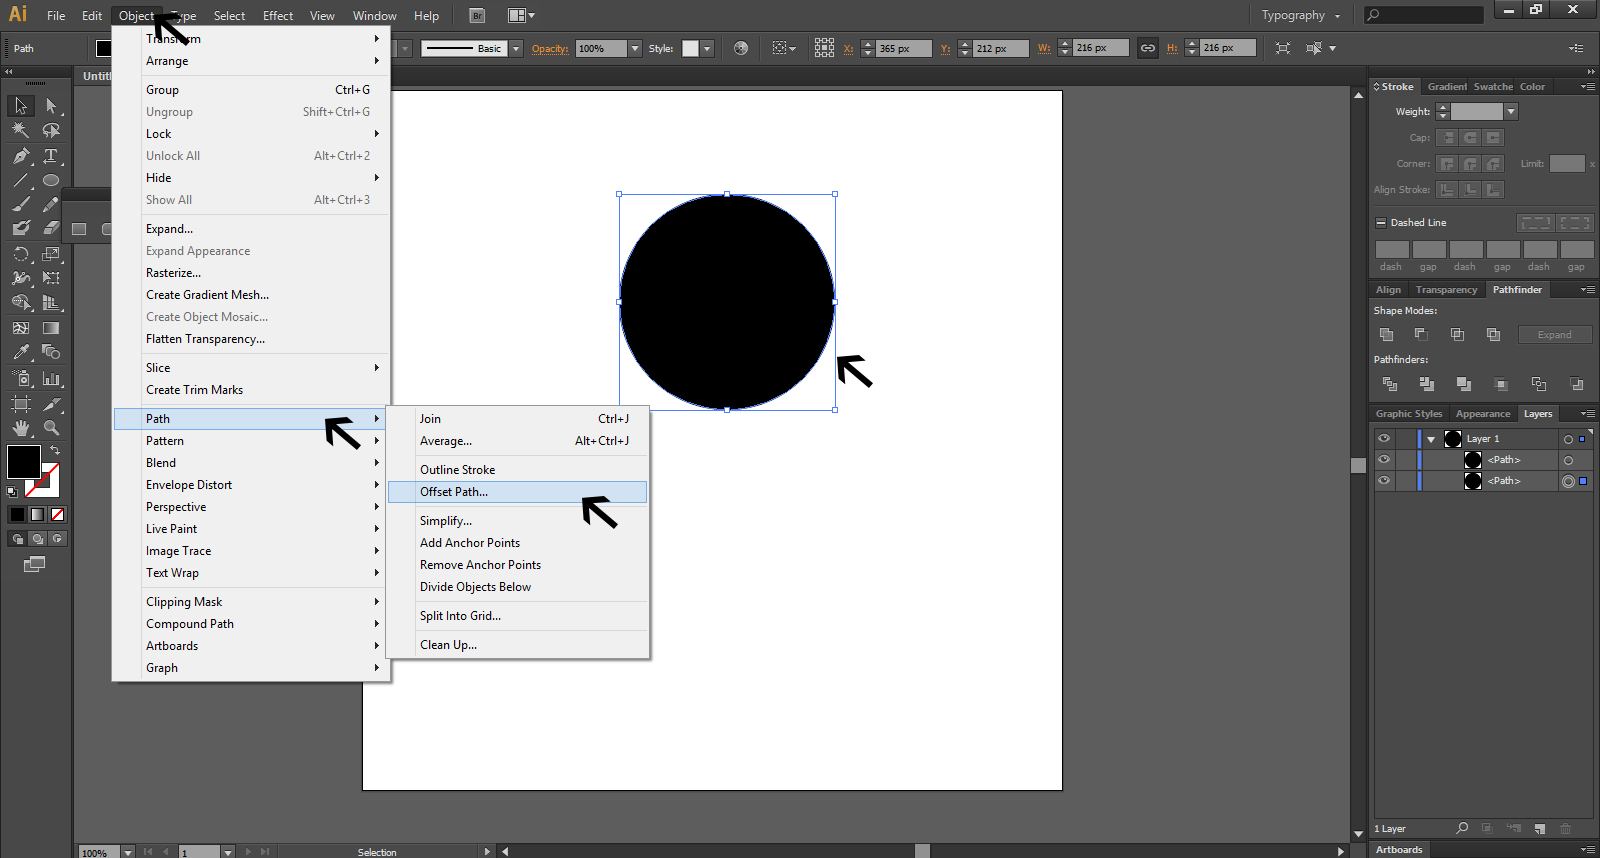
Step-4
You can then change the color of circle to white and send it to the back. To do so, select OBJECT>ARRANGE>SEND TO BACK [Cmd+Shift].

Step-5
Then, again go to OBJECT > PATH > OFFSET PATH. Get Offset Path and fill the required numbers
Step-6
Now, increase the offset. Change the color to black and send this to the back. This leaves you with a thick black outline around the circle. Now you can create a wavy outline by using the Zig Zag effect.

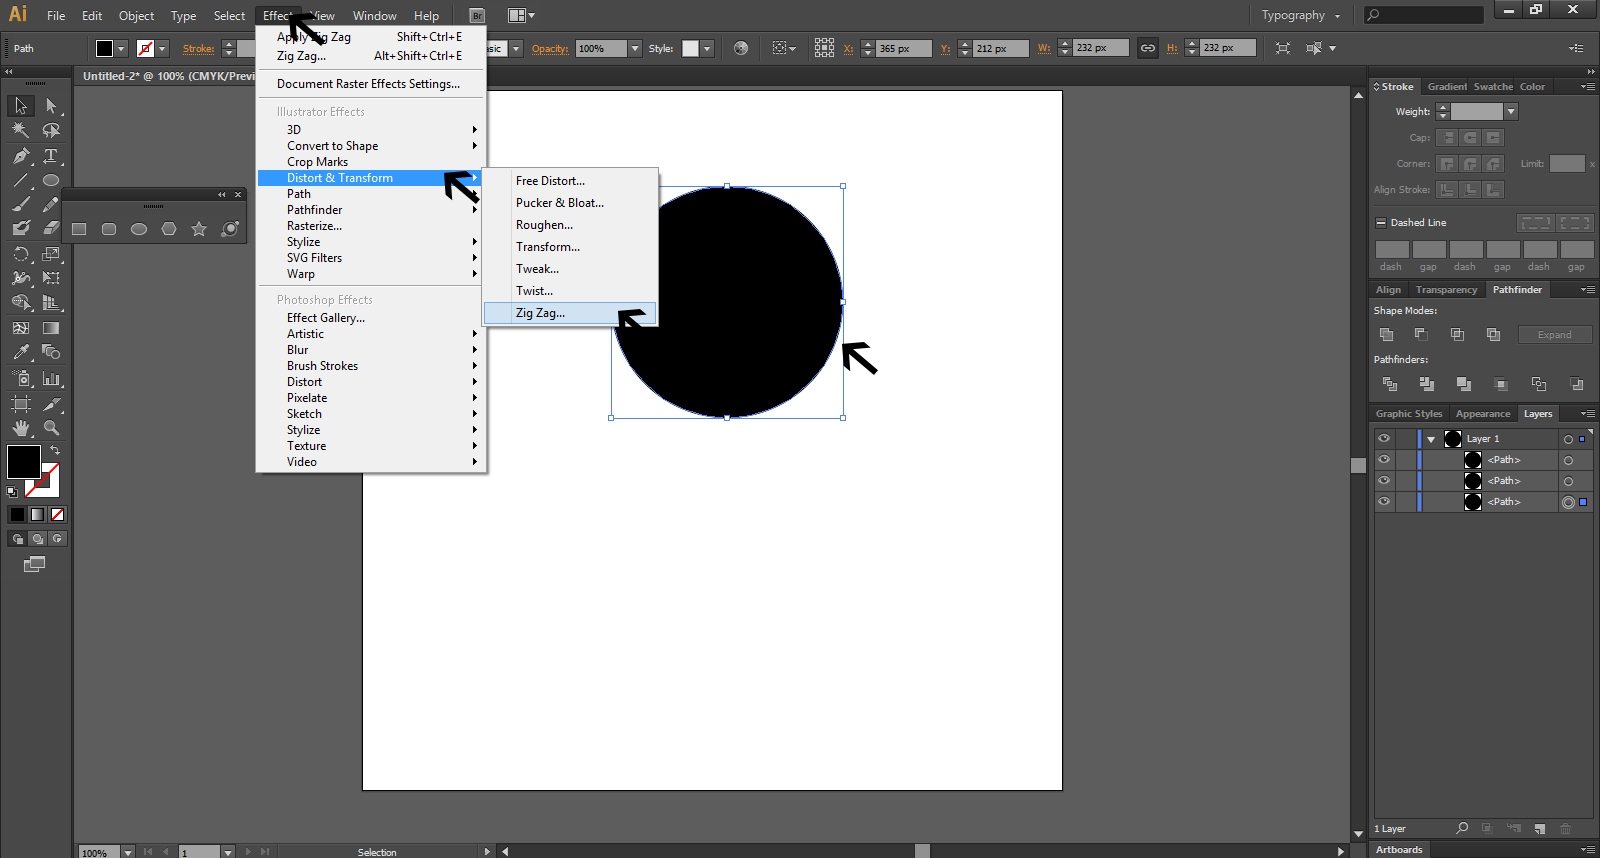
Step-7
As a next step, go to EFFECT > DISTORT & TRANSFORM > ZIG ZAG. Then, adjust and smooth the sliders by changing points and get wavy outline and click OK.
Step-8
Fill the parameters in the Zig Zag and click OK

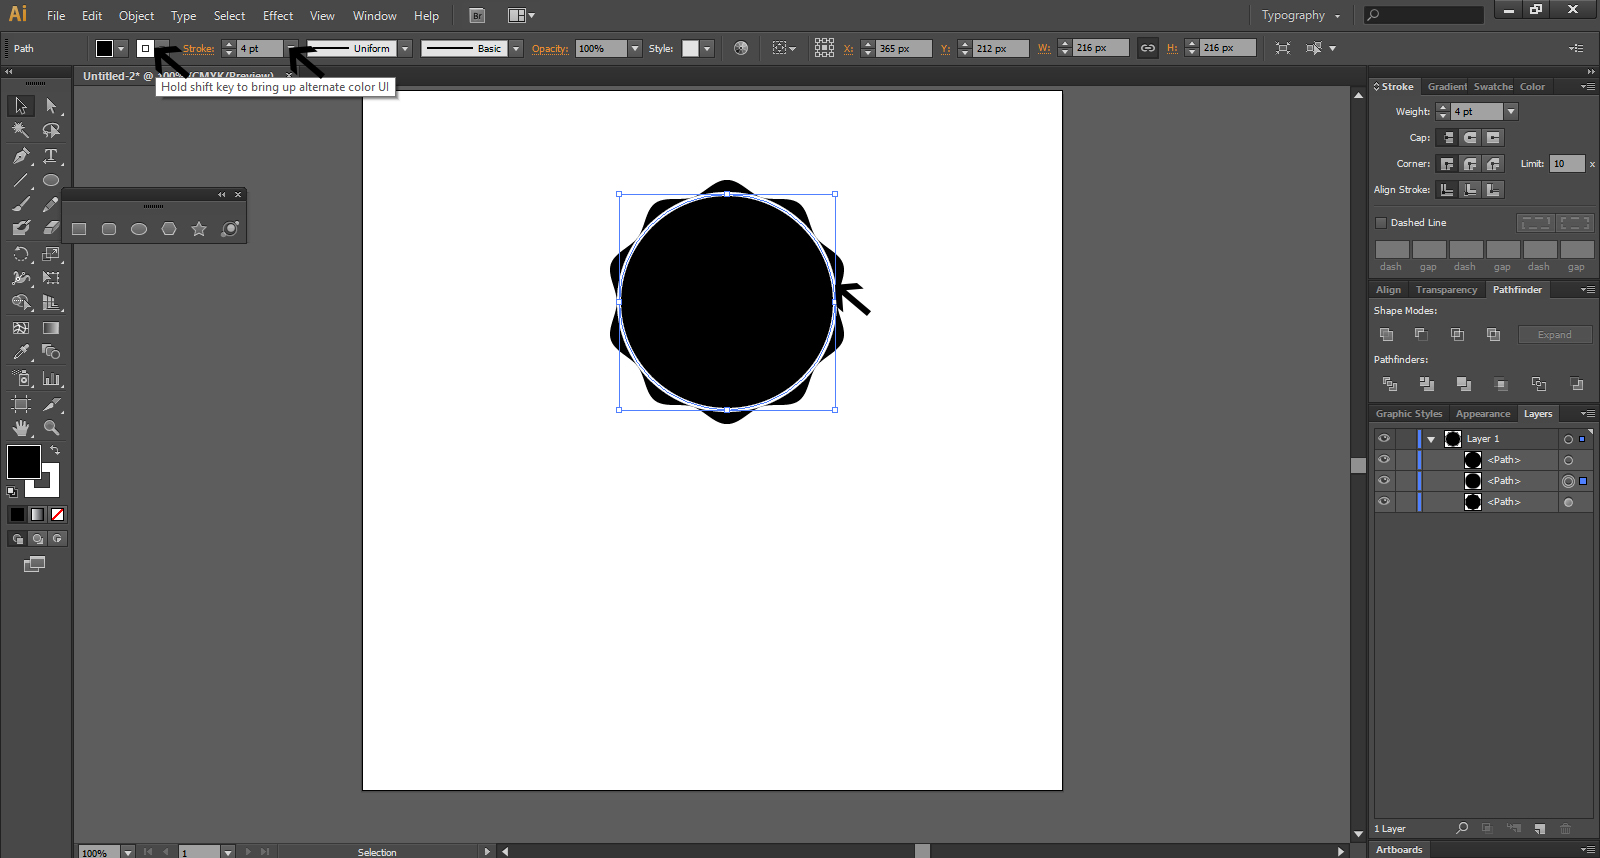
Step – 9
Go to OBJECT > EXPAND APPEARANCE to expand the effect. You get a Zig Zag feature outside the circle
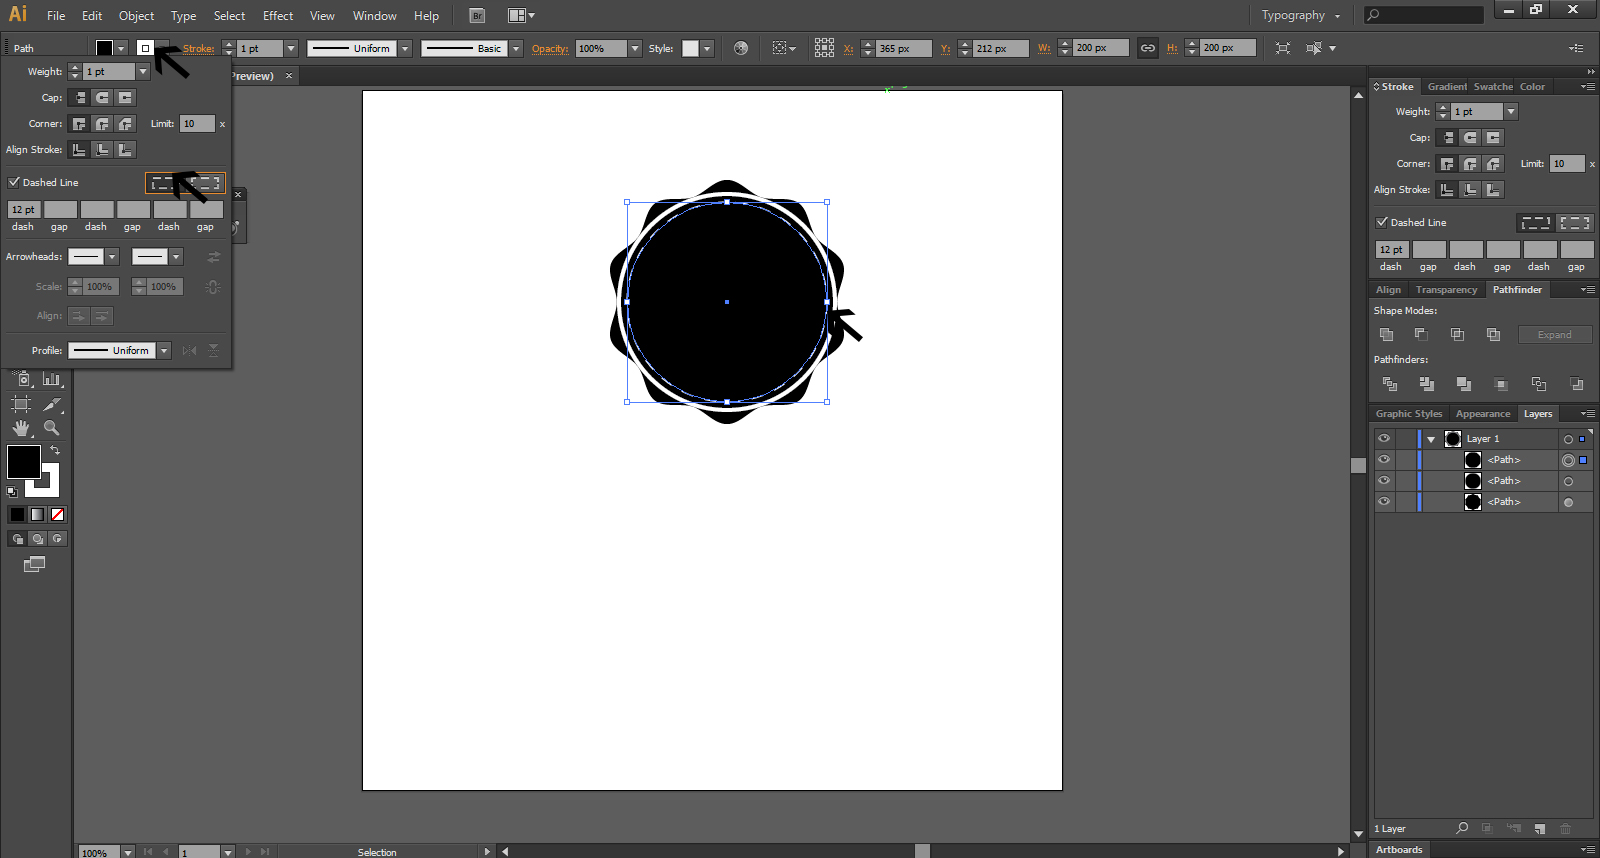
Step-10
You need to create a cool stitch effect to the inside of the circle. To do that, you should select the innermost circle and go to OBJECT > PATH > OFFSET PATH. This time, draw a smaller circle in the inside by applying a negative offset.
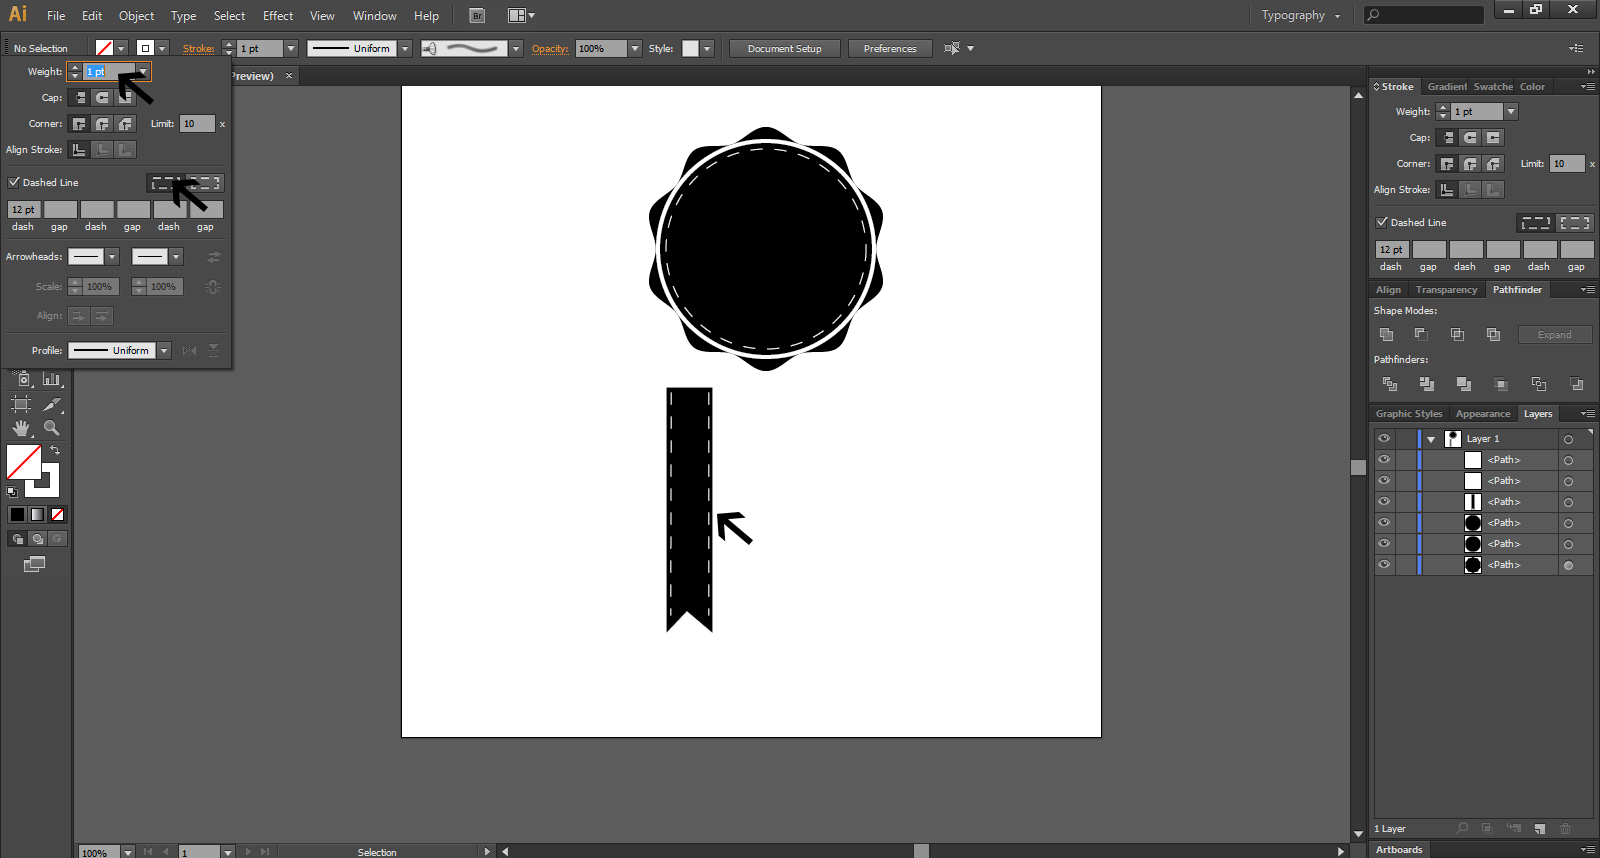
Now you can change the stroke color to white and remove the fill color. Change the weight to 1pt in the stroke panel and ensure that you check box labeled ‘’Dashed Line.’’
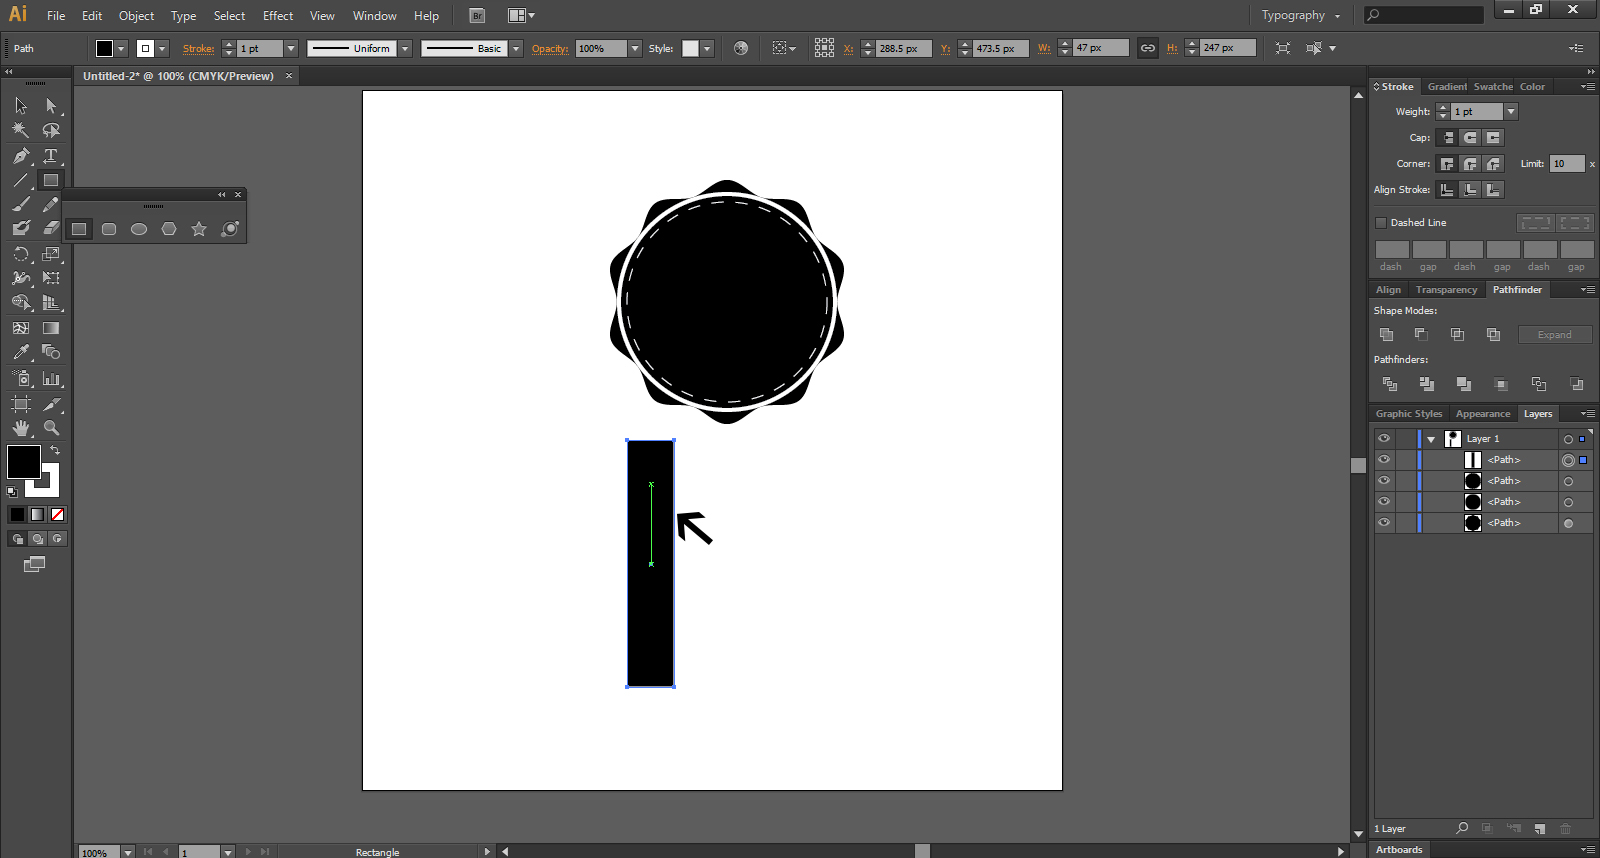
Step-11
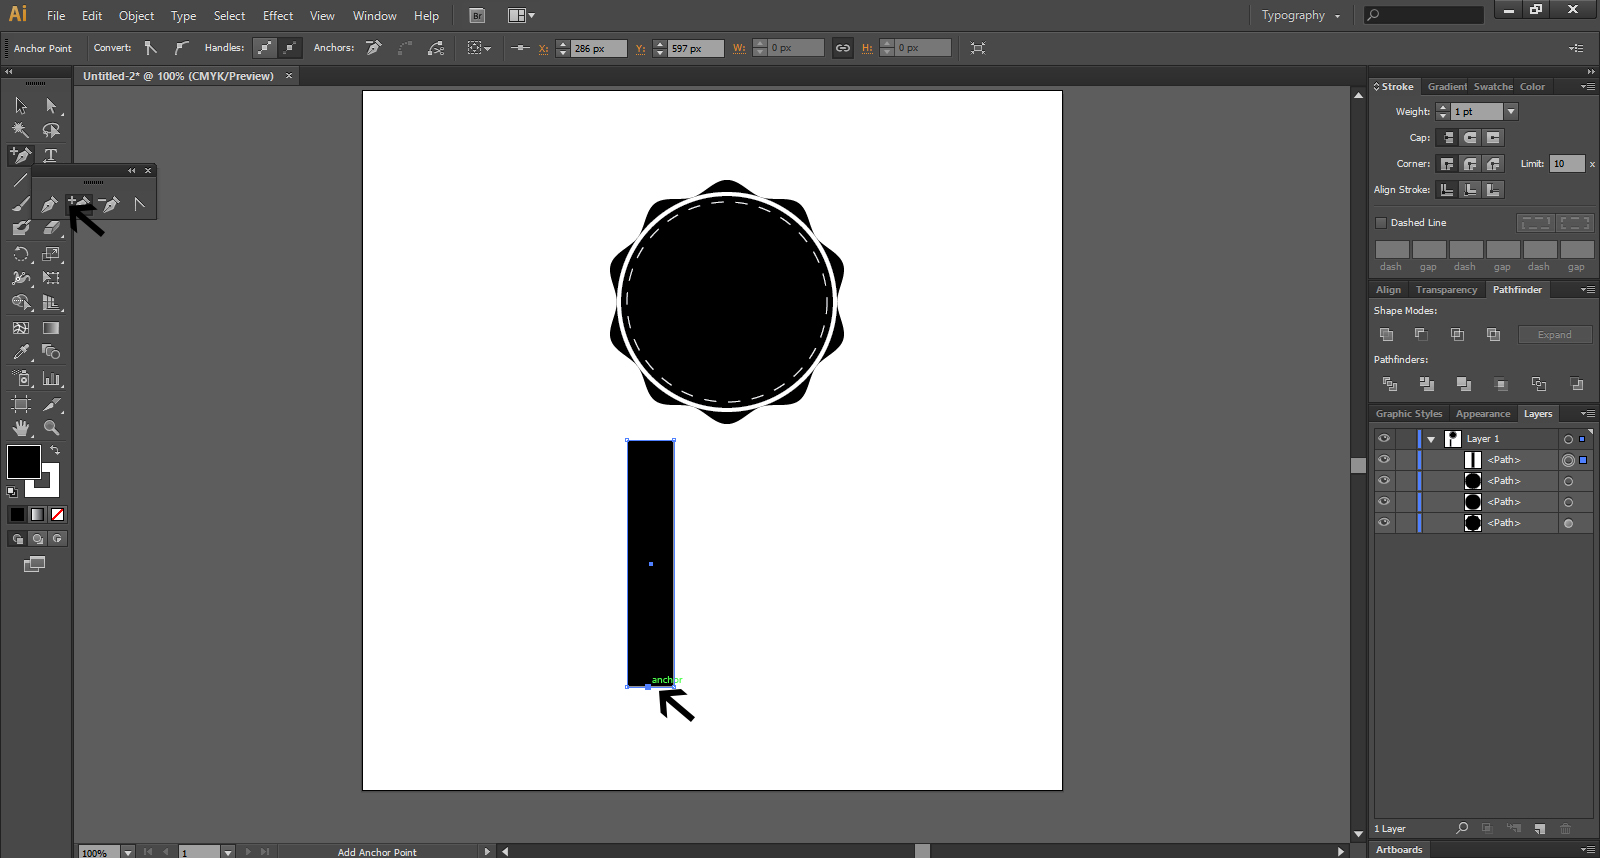
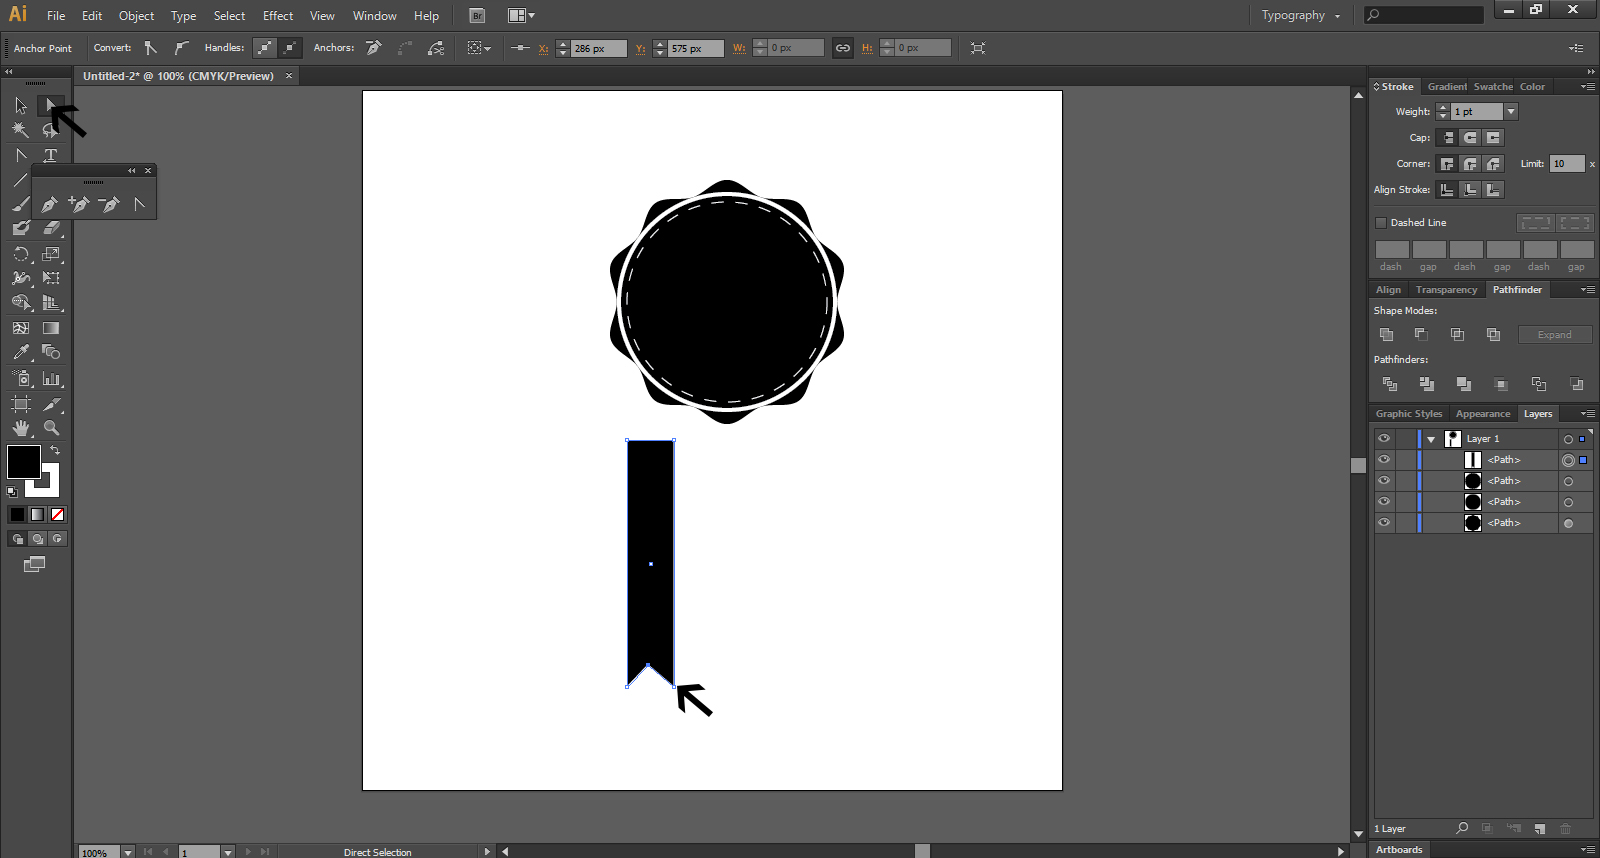
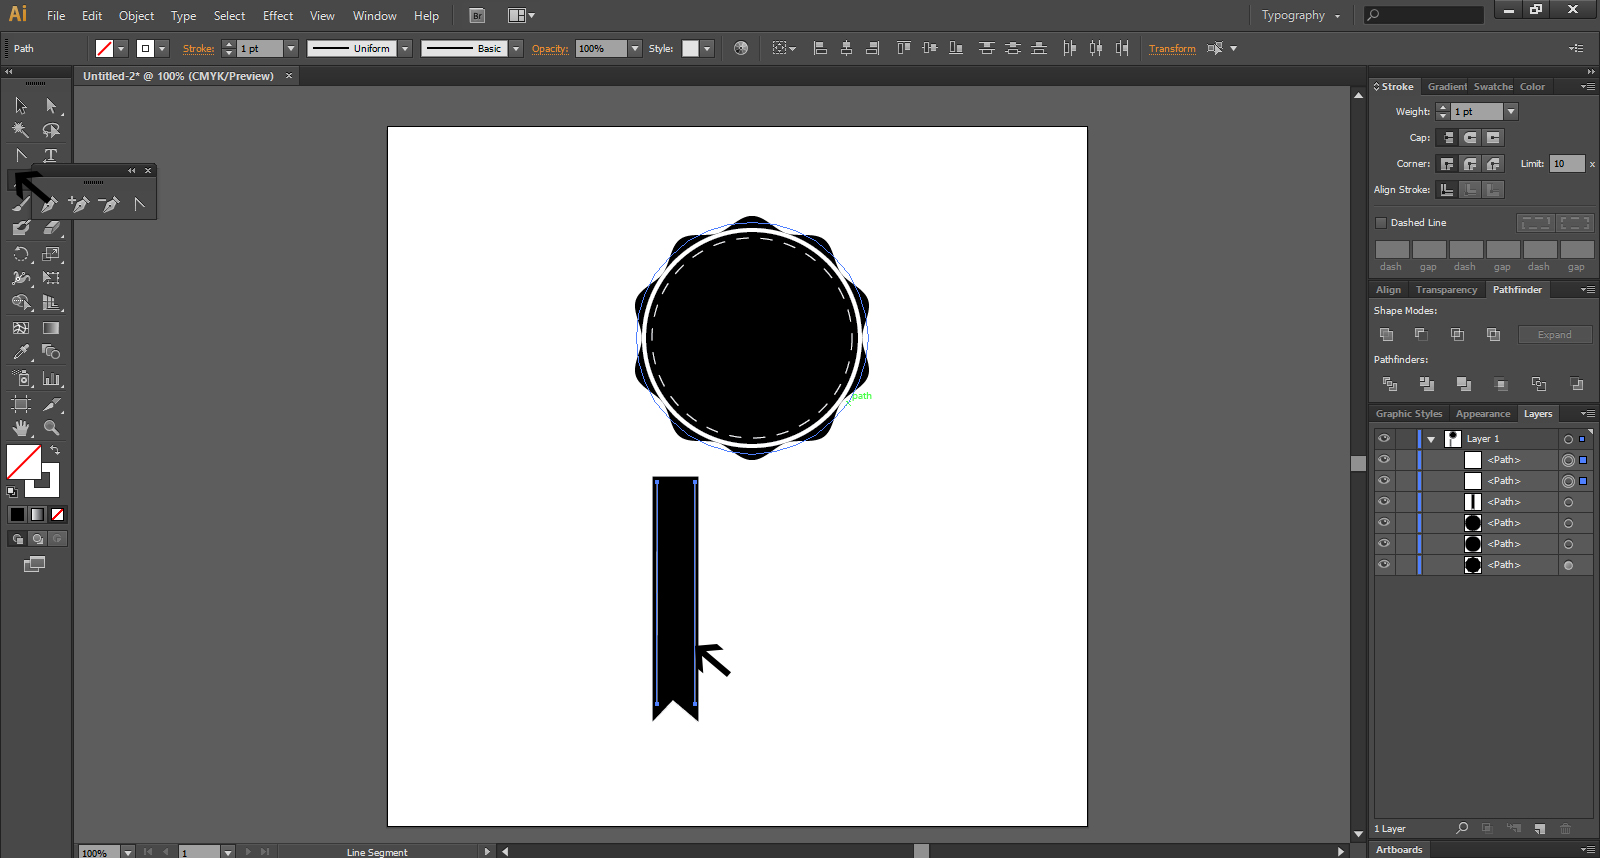
Now create a ribbon. Start with a rectangle. Draw A line with the line tool and select VIEW>GUIDES>MAKE GUIDES. You should use Add Anchor Point Tool that is located in the pen tool drop down, and add an anchor point that is in the middle of the bottom line.
Select the new point and hold shift to move it upward so that you can make a V shape to form the bottom of the ribbon. You can then create stitch effects on both the sides of the ribbon by using a line tool and add white dashed stroke of 1 pt.
Step-12
Select the inch measure on the rectangle
Step-13
Create an angle at the bottom of the rectangle
Step -14
Create side measurements of rectangle
Step -15
Create Dashed Lines at the side of the rectangle
Step-16
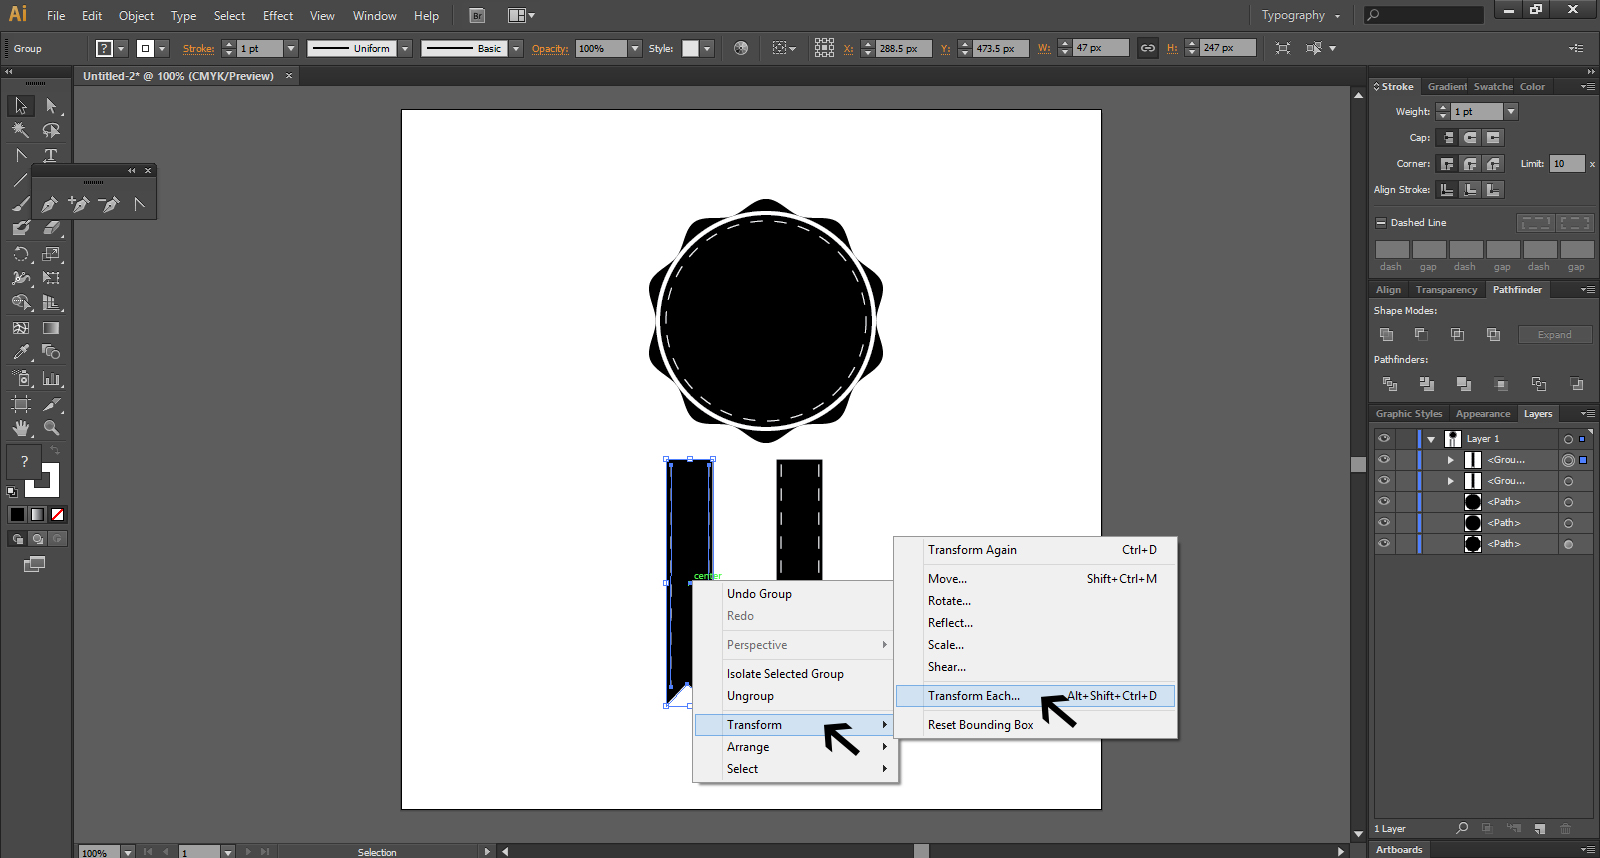
Align the ribbon under the badge after you send the ribbon to the back. You should now use reflect tool to duplicate the ribbon for the other side. To do so, go to OBJECT > TRANSFORM > REFLECT and click on COPY. Now you can move the second ribbon under the badge.
Select Undo Group> Transform> Transform Each
Step – 17
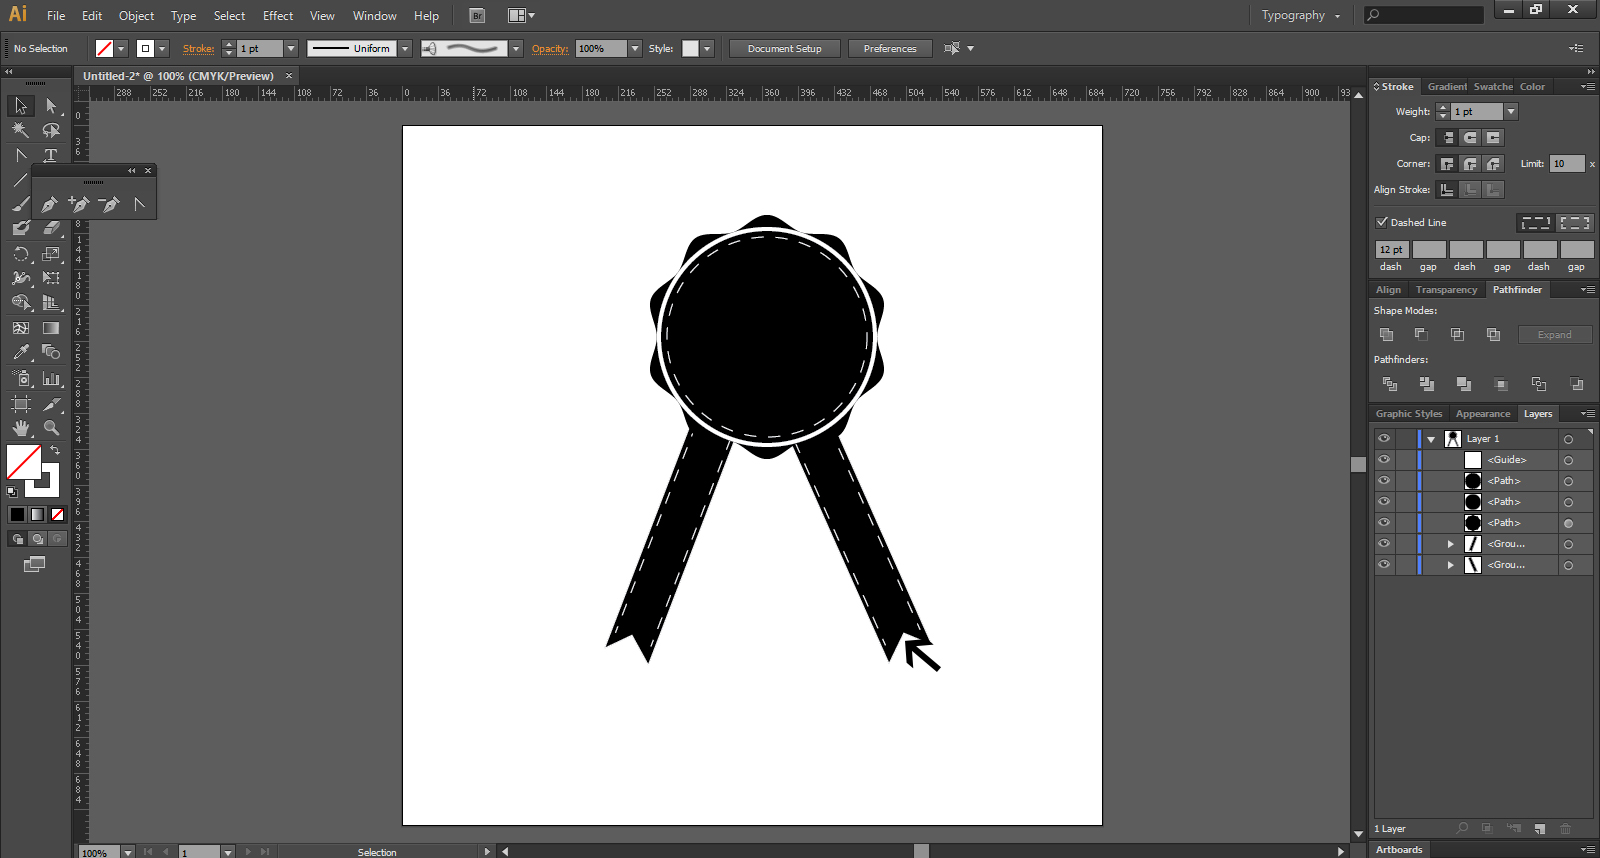
Place the two ribbon rectangles at the bottom of the circle
Step- 18
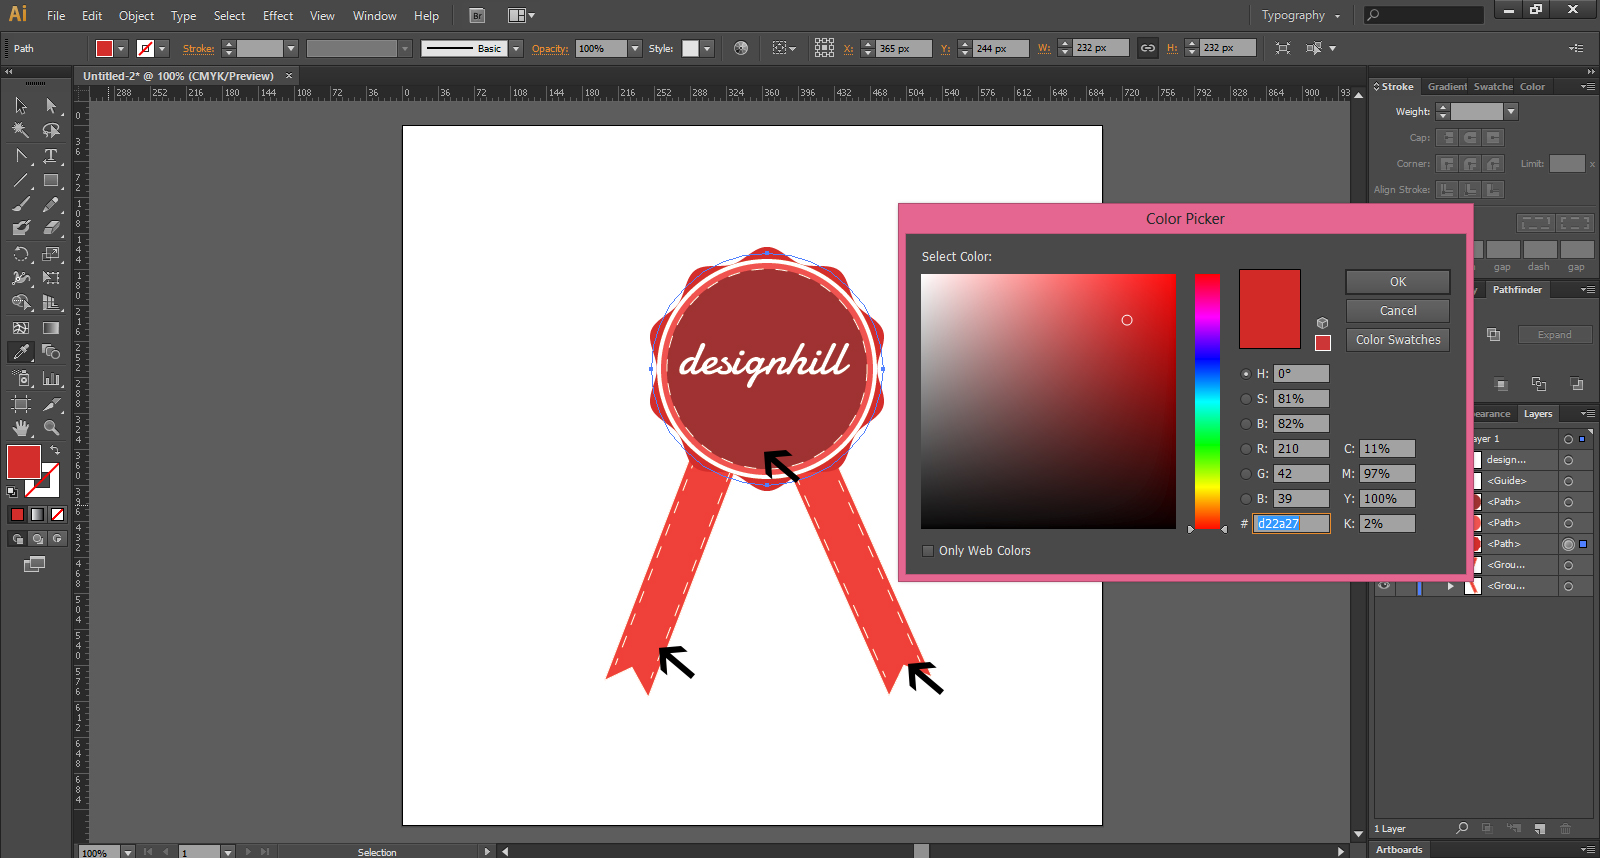
As a last step to create a green eco-friendly Vector label, you can include some diagonal text across the badge and underline the text with a line that can be of 2pt. To give it a finished look, select rounded ends.
Looking for Customized, On time, Logo Designs? Launch a Logo Design Contest today. Choose from 100+ designs. Take your pick! We offer a full 100% money back guarantee! Finally, a risk-free way of getting a customized design.
Like our blog? Follow us on Twitter, Facebook and Linkedin.


