Last updated on December 17th, 2019
If you are here, then you might be having a blog, regular website images, or an online store that you want to look awesome, and it requires time to optimize the images that you upload.
What do we mean by the term “optimizing” an image? Well, you can think this in two ways
- To make sure that your images are possible to be indexed by the search engines
- To make sure they look nice
In this article, we’ll focus on both of the points mentioned above. The best thing is that all of these can be done with the free to use apps and you don’t need Photoshop.
Here Are Some Tips On How To Optimize Website Images For Better Design
01. Use High-Definition Pictures
You don’t need to hire a Photographer for the awesome photos for your website. With the rise of the internet market, there are tons of high-quality original photos on the websites. Many of them are even free to use for commercial purpose. Some of them are:-
- Unsplash
- Pixabay
- Barn Images
- SplitShire
- PicJumbo
- Little Visuals
And you can find much more…
Well, of course, it isn’t possible to use these stock photos for everything (for example photos of your product or team). If your work requires taking photos of your products , then here are few tips that can make your pictures look good and more professional, even if you don’t own fancy camera equipment
[Source: Designhill’s Gallery]
Tutorial to create your own lightbox:
If you are searching for graphic content, then there are many free online tools that you can use for creating your own photos with text overlay. Two of which are PiktoChart and Canva. In case you’re searching for a logo, the do check Designhill.
Looking for a website design?
We have helped thousands of business owners from all around the world with their graphic design needs such as a logo design, website design, social media posts, banner and much more.
Hire A Website DesignerGet a free quote
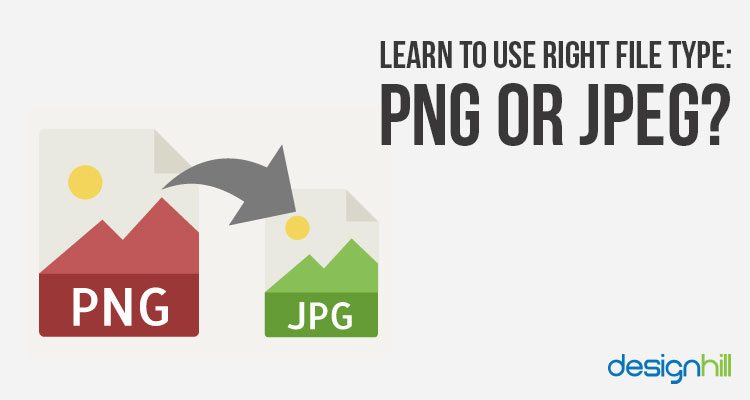
02. Learn To Use Right File Type: PNG or JPEG?
When you deal with images, it’s most probable that you’d encounter a PNG or a JPEG (or JPG) file type. Both have their pros and cons, but if you remember what to do for following cases, then your life might become easy.
-
-
- Save and upload Photographs as JPEGs : This type handles all the colors in a photo in a very efficient way. Therefore you won’t face the problem of having a monster file size as you would in PNG.
- Save Graphics with a flat area of colors using PNG: This type can be used to store most of the design files, images with text, infographics and logos. Usually, PNGs are of higher quality than JPEGs, and they handle the details with the crisp lines. Therefore when you zoom in and out, you won’t lose any quality. If you get an option, then we’d recommend you to save your PNG file in 24 bits instead of 8 bits as they have better quality and are rich in colors.
-
Photographs should usually be saved as JPEGs.
Graphics and logos should be saved as PNG.
Recommended Reading:
Now you might want to know what to do when you have to use a photo with a text on it? If the major portion is a photograph, then stick to JPEG.
It is possible to convert PNG to JPEG, but when you convert from JPEG to PNG, you won’t gain any quality. So, if you have your logo in JPG, then it is better that you go and ask your designer for PNG since even if you convert it, it won’t benefit you.
03. Learn To Balance The Resolution And File Size For Friendly Web Experience
When we are dealing with images in website design, we all want to find the perfect balance between the resolutions and file size. When your image is of higher resolution, your image will look better, but it would also increase the file size. Also, huge files can slow down the load time of your website. This damages user experience and in the worst case can lower your search engine ranking.
You also need to be careful of using a large low-quality image, as it would look pixelated and blurry.
[Source: Designhill’s Gallery]
So, what should you do? Well, first the term “size” is relative. What you would like to print is much larger than what you put on your website. Here are few tips that would help you:
-
-
- Image Size: It is a measurement of images in pixels. On the internet, the images are measured in pixels. For example, an image feature on a web page can be 500x 700 pixels.
- File Size: It is the number of bytes a file takes on your pc. This is one of the factors that can slow down your website. If your file size is large, then it indicates that either the resolution of your photo is too higher or the size of the image is huge.
- Resolution: It is the density of an image, and is measured in dpi (dots per inch). Most computer screens display 72dpi at max, so if your file’s resolution is bigger then it overkills. When a program has an option to “save for web”, it means that you can save file at web-friendly, low resolution.
-

How To Know Image Size, And Resolution Of Your Image?
It is easy to find the image size and file size on your laptop/computer. If you’re on PC then right click on your image and choose “Properties” and then go on “Summary” tab. If you’re on Mac, Ctrl+Click on the image and opt for “Get Info.”
[Source: Designhill’s Gallery]
If you want to find the resolution, then you need more advanced software like Photoshop, but if you use basic photo editing tools, then it will save images at web-friendly, lower resolution automatically. Pixlr is amazing for presenting your image at 72dpi. And Canva gives an option for “save for web” with PNG at 92 dpi.
Cheat Sheet For File Size, Image Size, And Resolution
Now as you know the various ways to tell image’s size, there are few rules that you should keep in mind:
- Full-screen background images or Large images should not be more than 1MB.
- Almost all other small graphics can be of 300KB or less.
- If you want to use a fullscreen background, then upload an image of 2000 pixels wide.
- If you have the option to “save for web” then always opt it for web-friendly resolution.
[Source: Designhill’s Gallery]
It is possible to make a large image of smaller, but the reverse is very hard to get. On Pixlr’s support centre you can see they wrote, “If you have a 100×100 pixel image and you want to turn it into a stunning 2560×1440 YouTube banner, the resulting image will become pixelated and blurry…If you think about it in terms of volume, you can’t make a gallon of water fit into a swimming pool.” And they couldn’t be more right.
Recommended Reading:
What Should You Do In Case Your File Size Is Large For Your Website?
If you own a nice camera then you might be taking some good quality pictures—maybe even way bigger than what you want for your website. Even stock photos of higher quality come with large file size. If your pictures are greater than 1MB size then you can do following things:
[Source: Designhill’s Gallery]
- Resize the Image: Assume that you have a photo of 5000 pixels, and you want to resize it. The good news is that you can resize it to 1200 pixels wide or even smaller if you want. This will reduce the size of your file. While resizing the image, keep in mind that your proportion is same so that you don’t distort the picture.
- Reduce the Resolution: If you use programs like Canva and Pixlr, they would automatically reduce the size of your image to a “web-friendly” size that is either 72 dpi or 92 dpi. You can even use PhotoShop for this purpose and save it as “save for web.”
- Use programs like TinyJPG or TinyPNG : Both of them will significantly reduce the size of your file without interfering with the quality you provide. It is one of the easiest options.
04. Make Your Images Of The Same Size And Style
Your web page will look much better if you are consistent in using the size/proportion and style of the pictures. This consistency will also help you lining your columns, texts and other in formations.
[Source: Designhill’s Gallery]
When you do work in consistency and symmetry, what is the next step? Well, now is the time to know what you should do so that images on your page will help you with the SEO.
05. Always Name The Image File Correctly To Get Benefit In Your SEO
It is quite normal that people don’t think much about naming the files. You may be kind of person who names website images as “Photo1.jpg” or maybe “screenshot1” etc. If this is true, then you need to rethink what you are doing to your website. Why do you ask? Well, because if you name your file correctly, it will boost your SEO.
To understand this, think in this way. When the Google scans your site, it reads the text, but it doesn’t see what’s in your image. Then the file name provides it information about the picture and thus Google or any search engine can interpret what the image is about. For example, you can name a picture of apple as “apple-green.jpg” or anything like that.

Thus the file name becomes part of the image’s URL, and if you name your file correctly, then it will make your URL easy to find and interpret.
To maintain the consistency, try to name your files in lowercase and number from 0-9. Try to ignore punctuation or spaces. And if you could it is best to use hyphens instead of underscores.
06. Fill The Captions And Alternative Text
When people are done uploading images on their website, they often forget that they need to fill the additional in formations. As it also gives your page additional SEO benefits, just like your file name.
Recommended Reading:
When you add alternative tags, they aren’t visible to the average visitors, but they provide search engines with the basic idea of what an image is about. Therefore, it is wise that when you add an image to your website, you should fill the alternative text field with stuff that describes what your picture is about and preferably uses the keywords. So, if you are posting a picture with graphic content or text on it, your alternative text can be exactly what the text says.
[Source: Designhill’s Gallery]
These two factors that are the file name and alternative text are significant for SEO of product pages. If you want, you can also add a caption to your pictures, since it is generally observed that people read the caption on images more than anything else.
Note: Filling the Alternative text, captions, and the file name are good for SEO, but you shouldn’t try the keyword thing. Since you want to accurately describe an image in plain English, if you add irrelevant or repetitive words then search engine deities will penalize you.
07. Place The Image Near Relevant Text
You should choose the image that is related to what your text is saying; it shouldn’t be completely on the topic. If your text is surrounded by relevant texts, then it will help your site to get better rank.
[Source: Designhill’s Gallery]
If you follow all of these tips, you surely will get better SEO for your web page, and with that, your page will look better. Because at the end of the day, what matters most is the user experience. Just keep in mind that if your website is educational, then you won’t get SEO boost from having a picture of an orange. It is better that you use photos of students, classrooms, and teachers, though it is recommended that you should use pictures that your readers find relevant.
If you have any doubt feels free to contact us. And if you want to give us suggestions then you are always welcome.