
Last updated on November 10th, 2021
This tutorial can be of great help to designers who want to learn creation of watercolor and marker style portrait.
We’ll be working through easy steps thereby creating digital portrait illustrations that are enriched with unique and tactile feel of marker and watercolor both. Though this tutorial does not focus on using a drawing tablet yet if you have, please use it, as you can effectively incorporate the use of pen pressure tool for drawing.
However, we have tried to create a similar type of effect through 4 brushes in Adobe Illustrator. There might be differences in techniques and their technical usages, but the overall look and feel of your portrait will majorly depend on your own personal style and way of designing.
This is a 3 part tutorial with each having 10 easy steps towards a watercolor portrait. In this part we will be learning how to set portrait transparency. As we proceed, we’ll learn setting up of the work area and brush tool as well. Going further we’ll learn the use of the paintbrush tool and calligraphic brush too.
Step 1: First Set Up Your Illustrator Document
Start with a print document of 1000 pt. x 1000 pt. Ensure that you change the color mode to RGB and keep the Raster effects High at 300dpi.

Step 2: Importing The Portrait
Now, import the photo or image you wish to use as a reference. We’ll be using the portrait of Lenardo di Capario that we have downloaded from Internet. You are free to use your own.
Go to File > Place and then import.
Now, size your portrait up or down as required but try sizing it up to the art-board.
Don’t change the resolution of the image since it is only a reference photo guide. You need to know the better is the quality of the image, the more detailing you will have to work on.
Since you are importing the portrait into the first layer, it would be appropriate to give it the name “Photo Reference”. You can make use of the Layers panel to do that.
Your work area will now look somewhat like this:

Step 3: Setting The Transparency
Select the photo and go to the Transparency panel.
Go to Window > Transparency.
Now, lower the opacity of the photo to 50%. This will allow you to just see the features, but not obstruct your tracing work flow. After that go to the Layers panel and lock the reference photo layer so that it accidentally does not get moved. 
Looking For an Illustration Design?
We have helped thousands of business owners from all around the world with their graphic design needs such as a logo design, website design, social media posts, banner design and much more.
Get Your Illustration DesignGet a Free Quote
Step 4: Creating Two New Layers
Now, go to the Layers panel and create two more new layers. Name the first as ‘Outlines’ and the second as ‘Fill Lines’.
Next you need to select the reference photo on your canvas.
Step 5: Setting Up The Work Area
You will now have to designate a workspace for painting. Since we are using Creative Cloud CC 2014, we get this option right on top under the Essentials. In case you do not find it you can search for it and don’t forget to check it so that you locate it easily the next time!
Go to Essentials > Painting.
This will set up an initial workspace and do the panels placement for the work you will be doing.

Step 6: Setting Up Your Brush Appearance
Now go to the Appearance panel to make it appear on the forefront.
Go to Window > Appearance.
Click on the settings available on upper left and the drop down menu will come up. Ensure that all the options are checked: Control, Brushes, Color, Color Guide, Layers and Libraries.
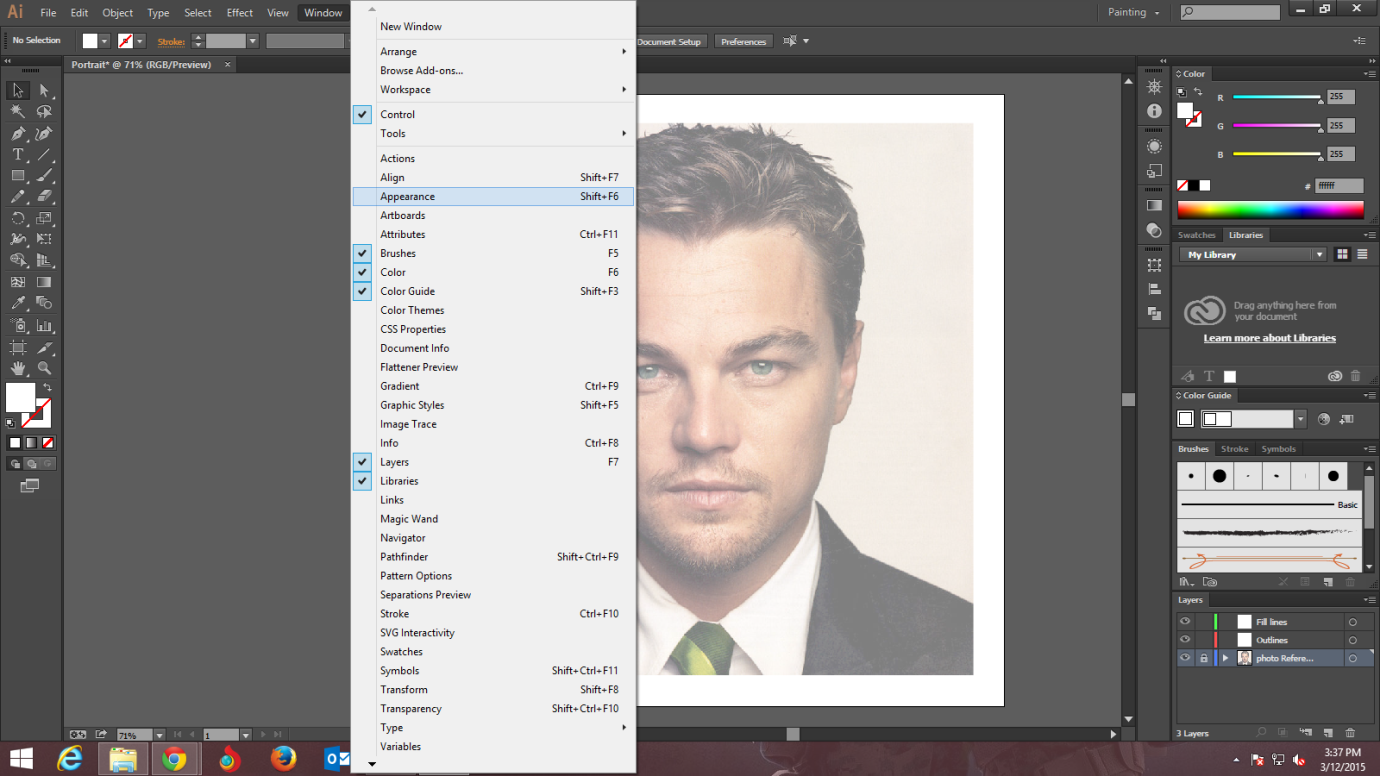
Step 7: Deselecting The ‘New Art Has Basic Appearance’ Option
Now, ensure that you have deselected the option ‘New Art Has Basic Appearance’ that appear on right. (See the screen shot)
Now you can close the Appearance panel.

Step 8: Using The Paintbrush Tool
Now, double-click the ‘Paintbrush Tool’ available in the toolbar. This will pull up the options dialog box of the brush.
Ensure that ‘Keep Selected’ and ‘Edit Selected Paths’ options are unchecked as they can obstruct with the natural drawing process. You can adjust smoothness to a lower value if you are confident in drawing strokes. However, if you have a shaky hand or wish to get straighter and smoother lines you can opt for a higher number.
Try placing the Fidelity pointer at the mid of Accurate and Smooth value as it goes well in most of the cases.

Step 9: Creating Calligraphic Brush
Now, go to the Brushes panel. First select a 1pt stroke and then double-click the 2 pt. Choose an oval default brush and name it ‘Calligraphic Brush 1’.
Make Angle, Roundness and Size adjustments as shown in the screenshot. Keep the roundness variation to 24%.
If you are using a tablet then of course you have lots of options. But don’t worry; even if you do not have it as you can still make adjustments to the head of the brush thereby adding some randomness to the stroke variability. These adjustments will create a more realistic marker look.
You can doodle a bit on a blank area of your canvas typically on the ‘Outlines’ layer till you acquire the type of brush you want.
Step 10: Initial Tracing
Go to the color selection area of the toolbar with your Paintbrush Tool selected. Ensure that there is no color-fill on the brush so that you are free to choose colors. Don’t opt for a 100% black color if you are aiming at a more natural look. Instead selecting black with a gray stroke works perfect.
Choose the CMYK, H, S, B, and RGB percentages as given in the screenshot.

In this part of the tutorial we learnt how to set up an Illustrator document, import a portrait and set its transparency. We created two layers, learnt how to set up the work area and set our brush too as well. We also learnt how to create the paintbrush tool and calligraphic brush thereby performing the task of initial tracing.
In the next part of the tutorial we will learn how to highlight the portrait face through effective detailing of hairs, nose lips and other facial parts.


