Last updated on December 5th, 2019
The Apple logo is one of the most appreciated for its symbolic value and simplicity of the design. While the company uses plain silver white Apple logo on its products, its color versions also have been in use.
Here We Show You The Steps To Create An Impressive Apple logo
Step-1
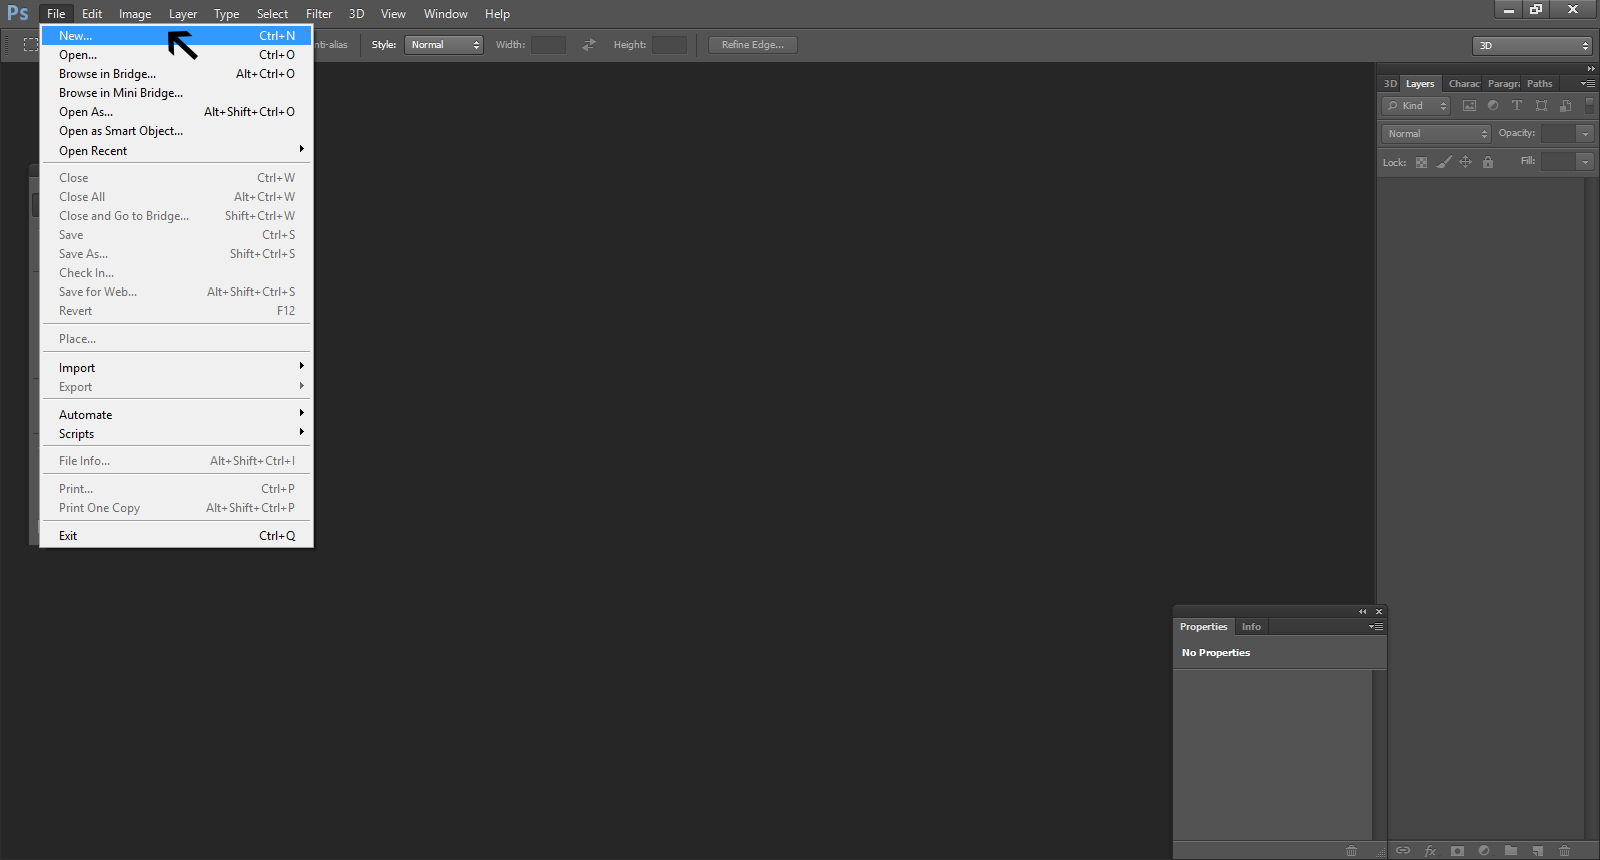
Go to the File menu and click on the New to open the document on Photoshop. You can use keyboard also to open the document by using the keys Ctrl+N
Step-2
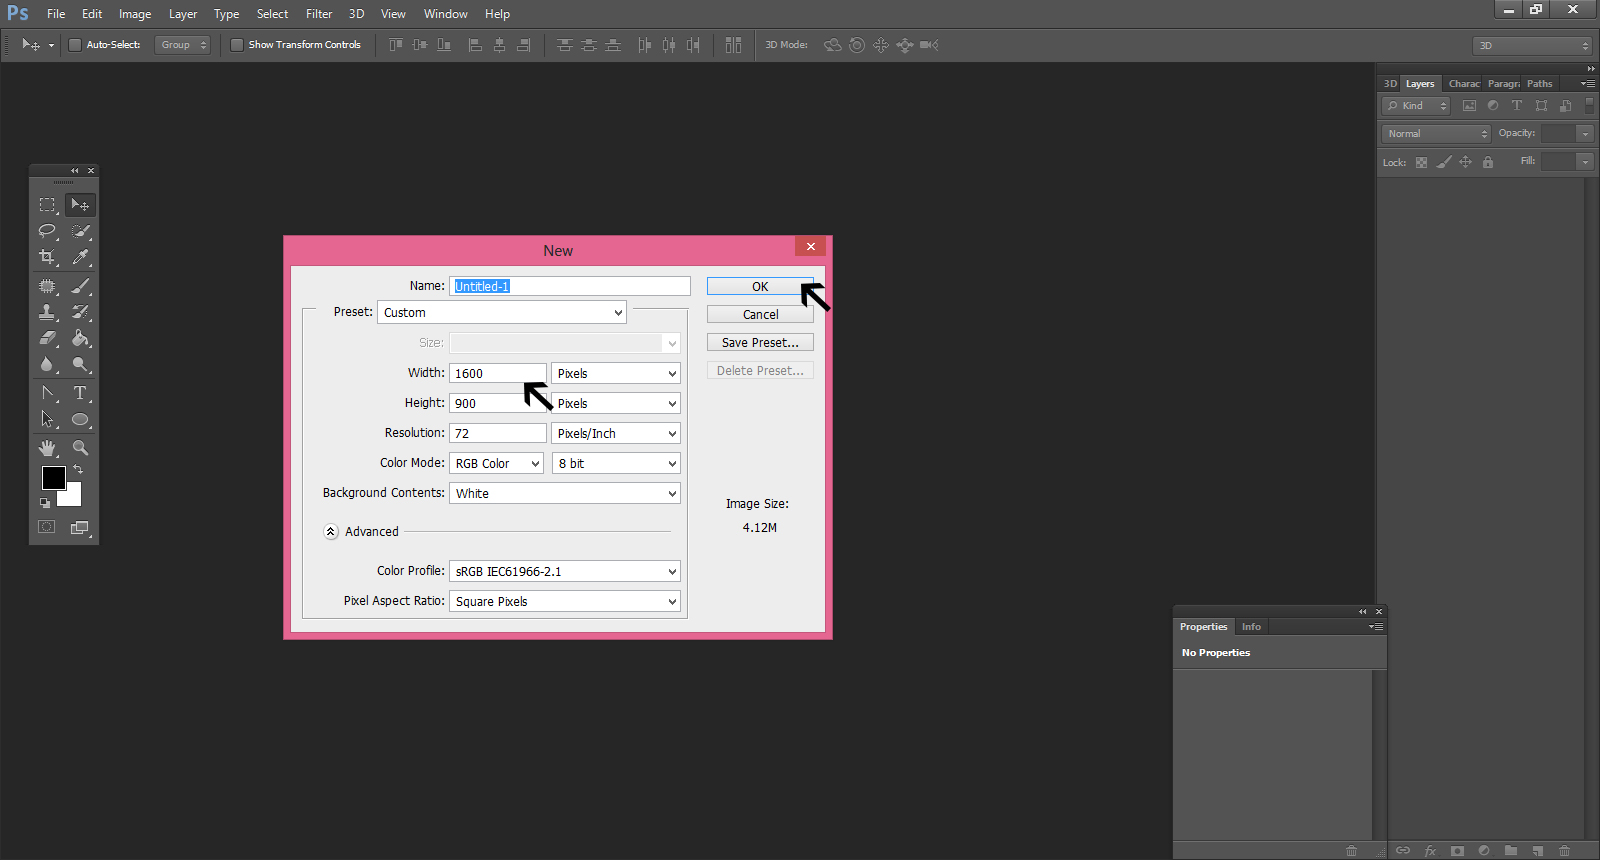
Get the New menu and fill your specifications for the design. Also, select the front square of the Stroke icon and fill it with black in order to have a black space outside of the document.
Step-3
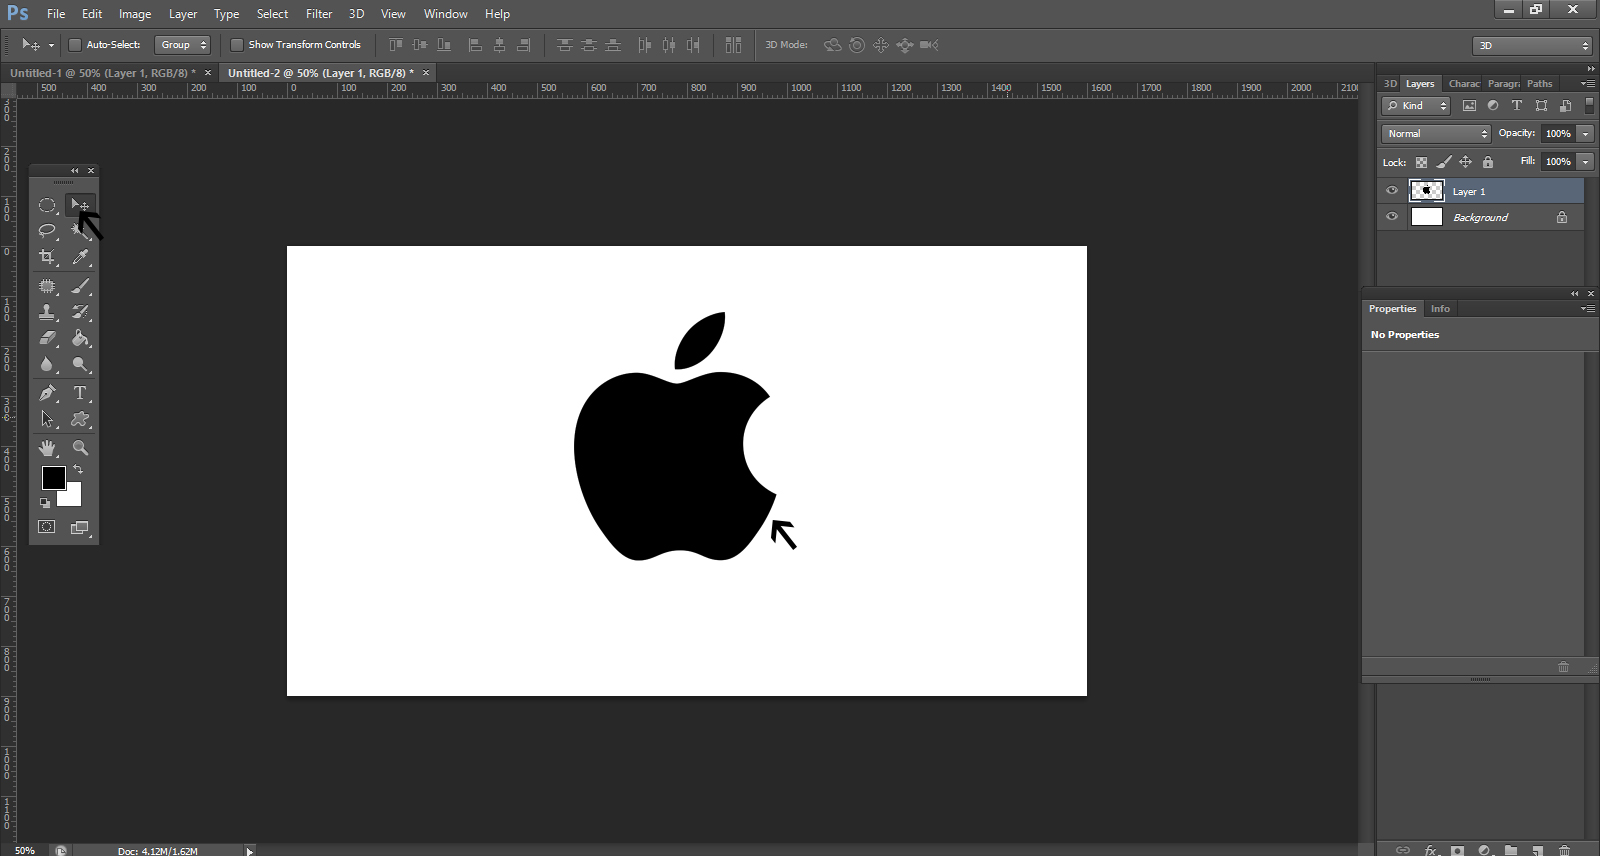
Bring in an Apple logo in .PNG file format and place the logo image on the document. If you need to do so, you can enlarge the image by applying the Free Transform command [Ctrl+T]
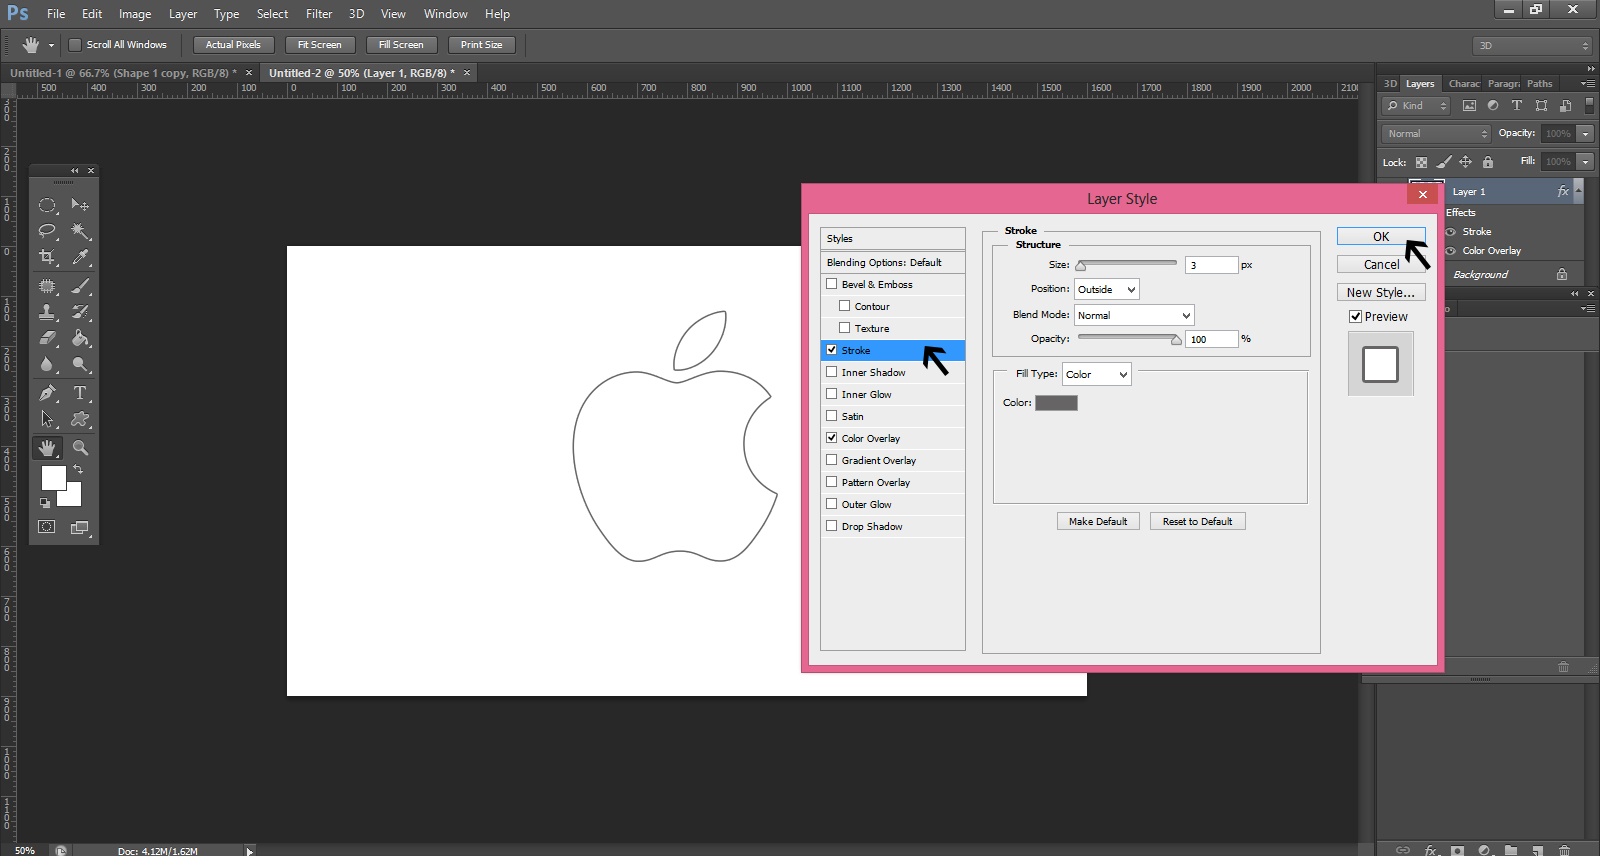
Step-4
Click on Add a layer style icon from Layers panel at the bottom and select Stroke and color overlay from Layer Style menu.
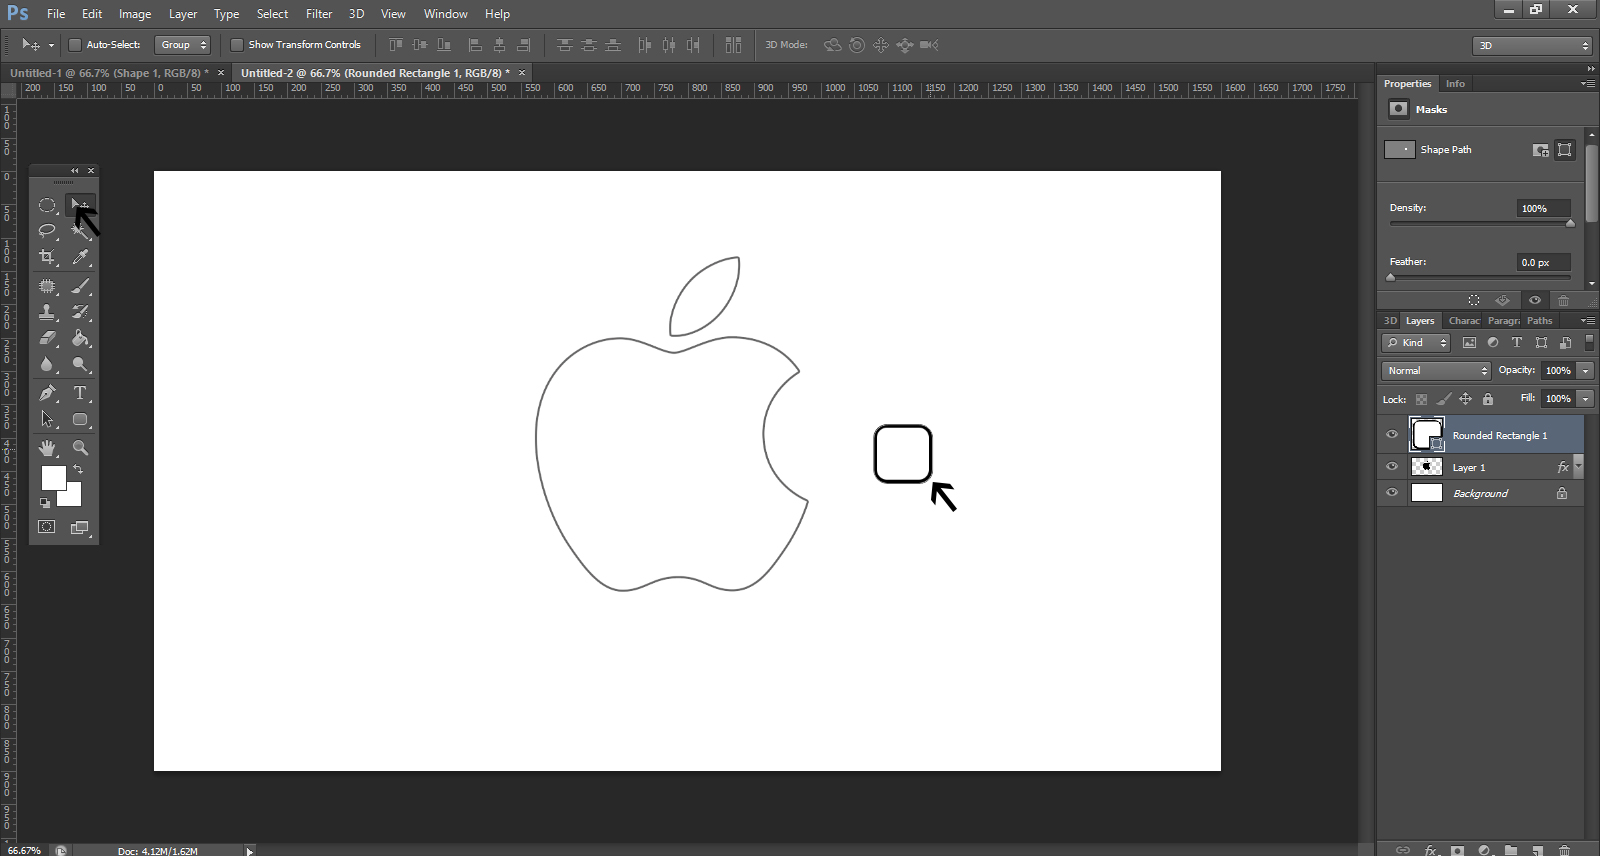
Step-5
Now you have the logo’s contour. As a first step to giving special appearance to the logo, choose the Rounded Rectangle Tool [U] and set Radius as per your choice in Options Bar.
![]()
Looking For a Logo Design?
We have helped thousands of business owners from all around the world with their graphic design needs such as a logo design, website design, social media posts, banner design and much more.
Get Your Logo DesignGet a Free Quote
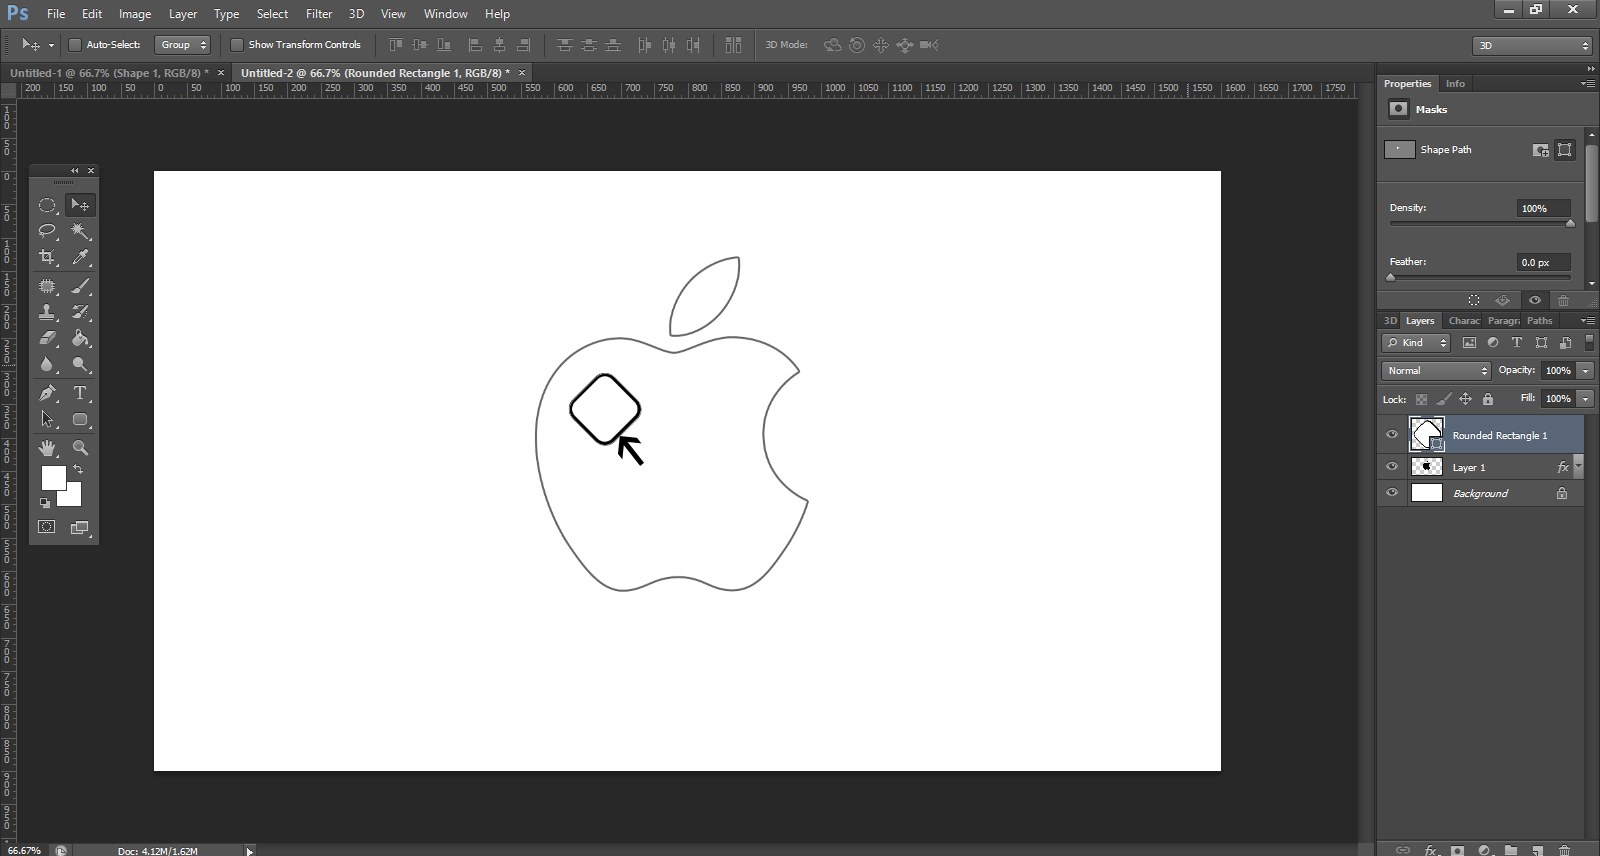
Step-6
Then, hold shift button and draw the square as shown here. You can also turn around the square on 45 degrees as you give the Free Transform [Ctrl+T] command.
Step-7
Click on the color bar and open the Gradient Editor. Select the color for the square and set the blending mode for this color before you click OK.

Step-8
Now you can rasterize the new layer. To do so, create a new one above the layer having the square. Then, you should select both the layers in Layers panel and press CTRL+E to Merge Down. You can then place the square in the logo’s contour by using the Move Tool. Make copies of the square as you use the Move Tool and hold Alt button and click on the square. If you want to change the sizes of the copies of the square, use Free Transform [Ctrl+T] command.
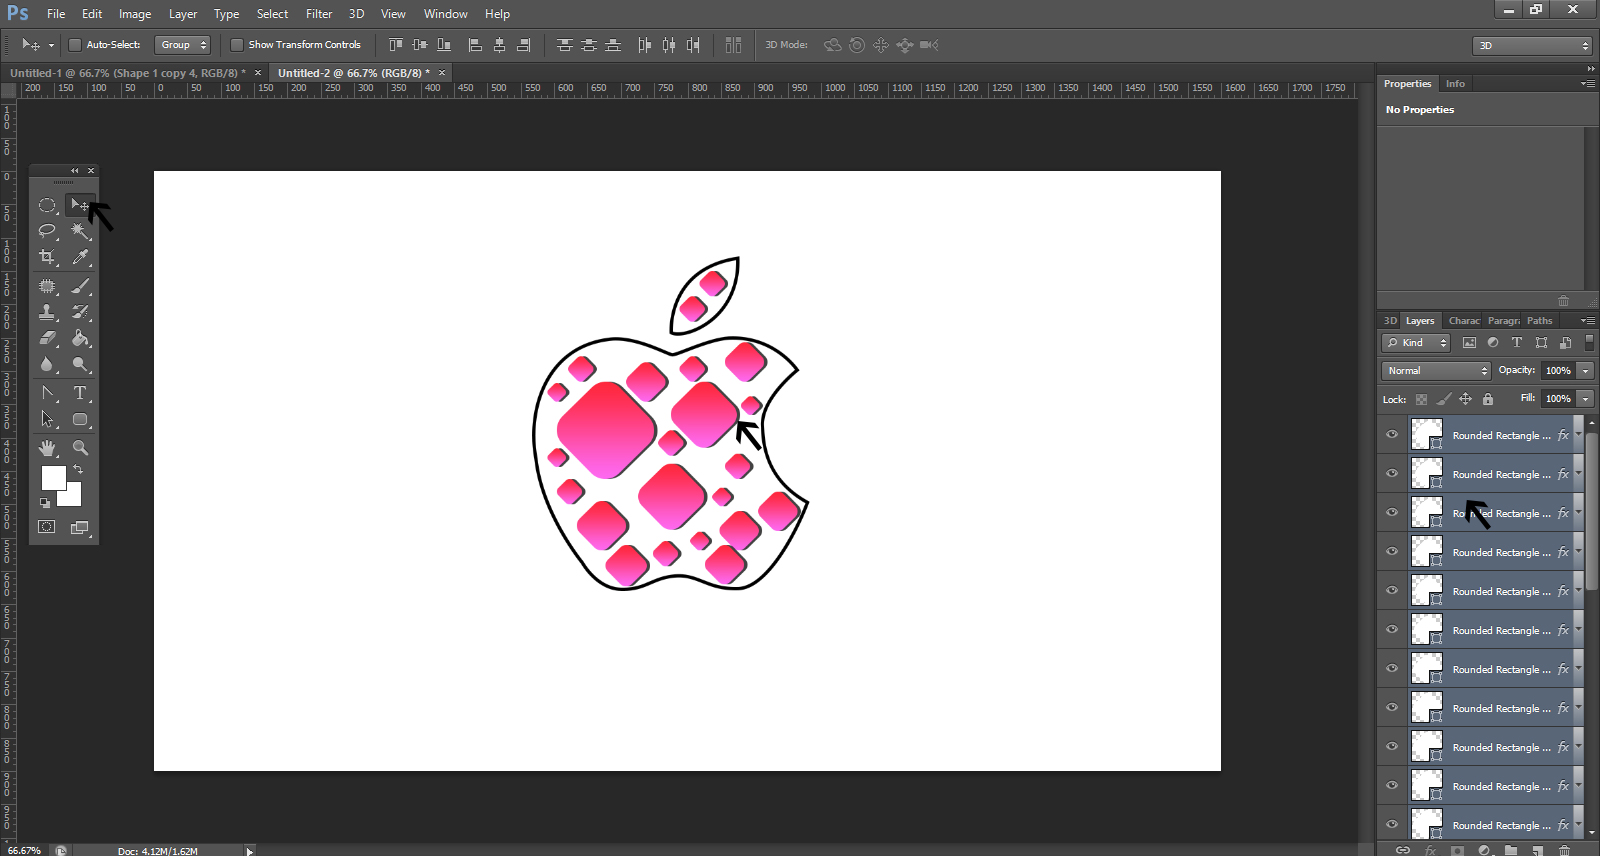
Step-9
Create the squares with some hues of your choice
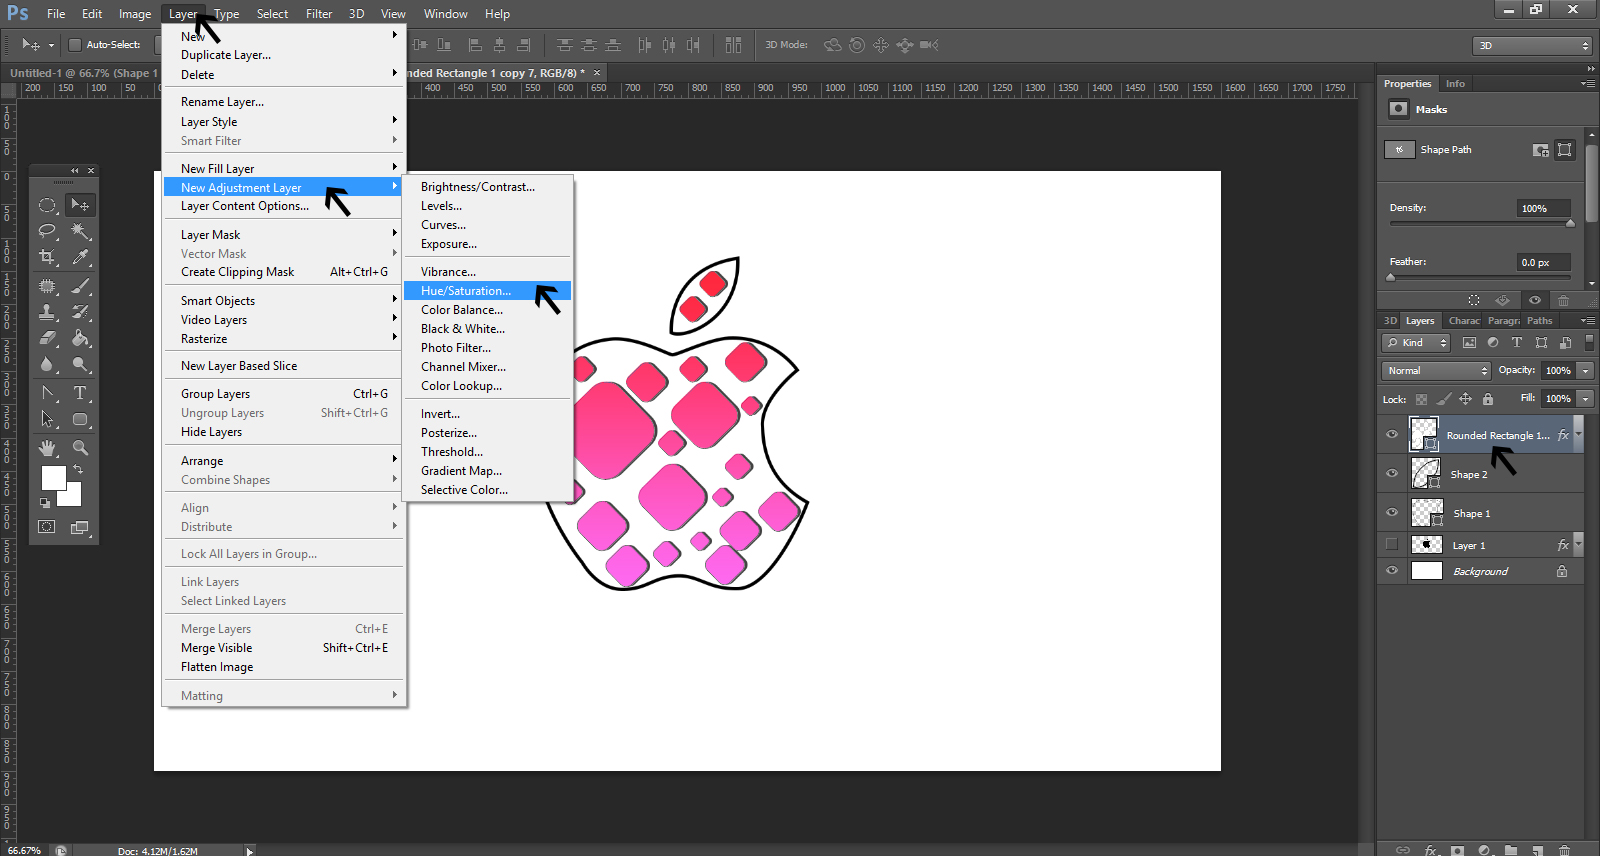
Step-10
Go to Layer menu and select New Adjustment Layer and then Hue/Saturation
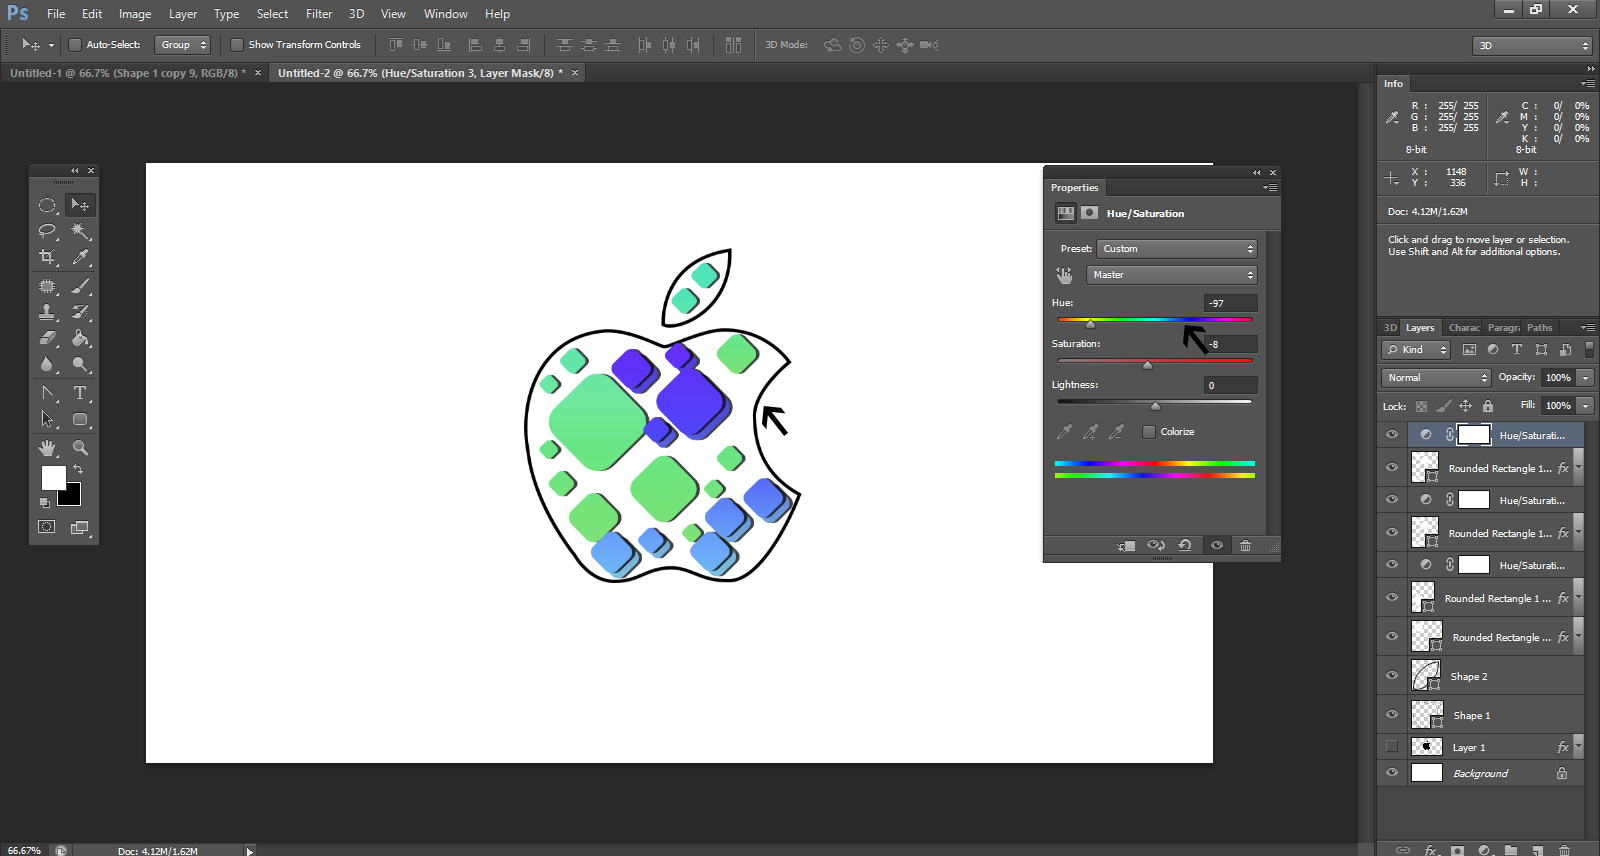
Step-11
Get the desired hues and saturation of your choice for the squares

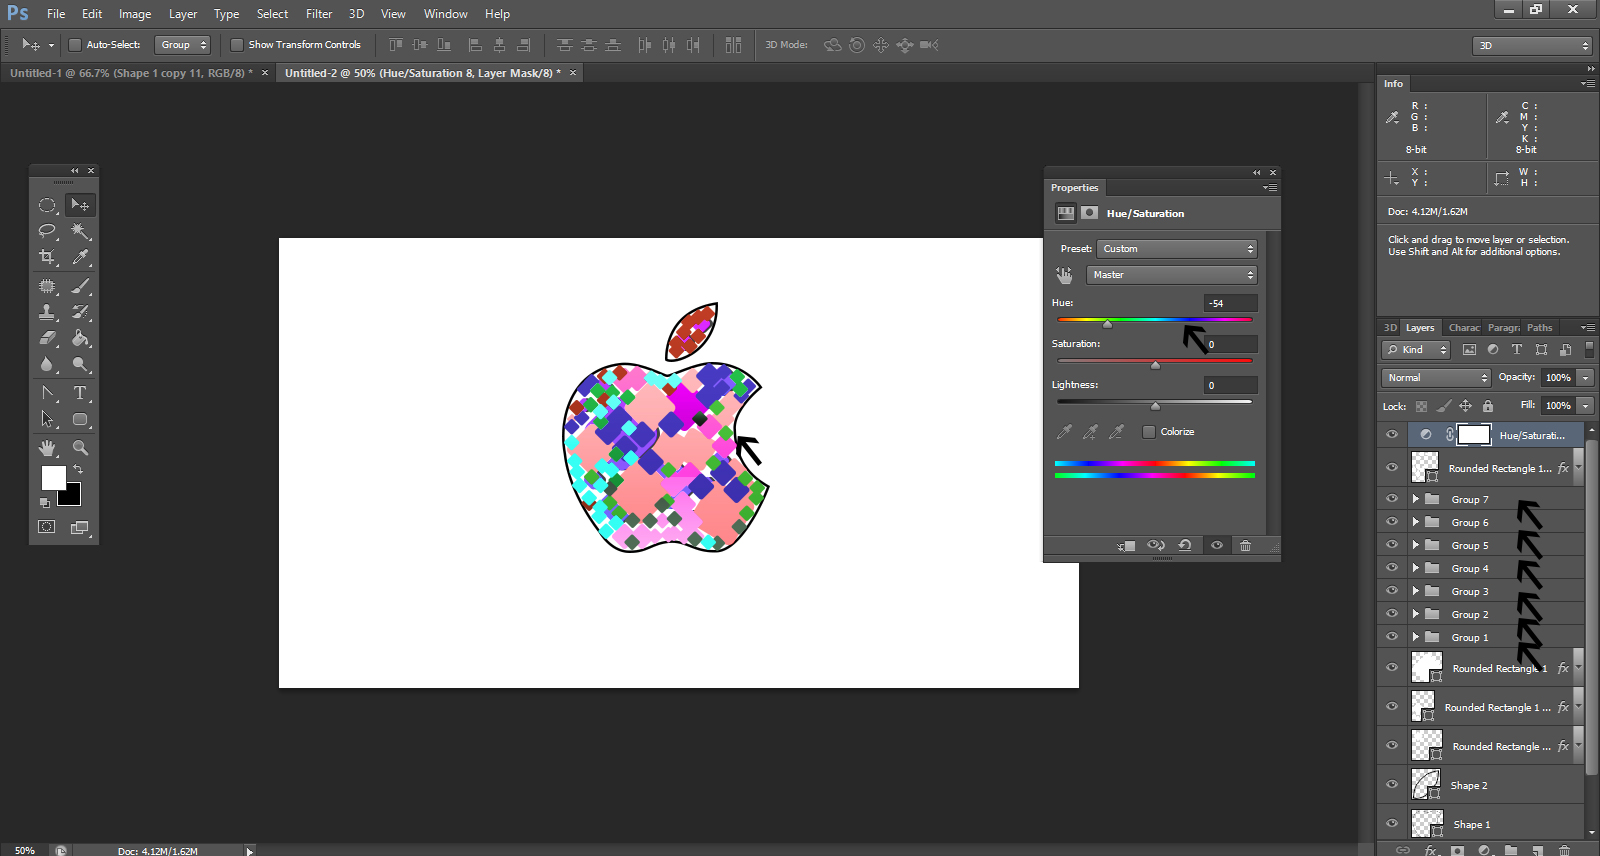
Step-12
You can give the squares different colors as well by adjusting the specification in Hue/Saturation menu
Step-13
Create an appearance that has the squares in different colors with the help of Hue/Saturation menu by adjusting the bars.
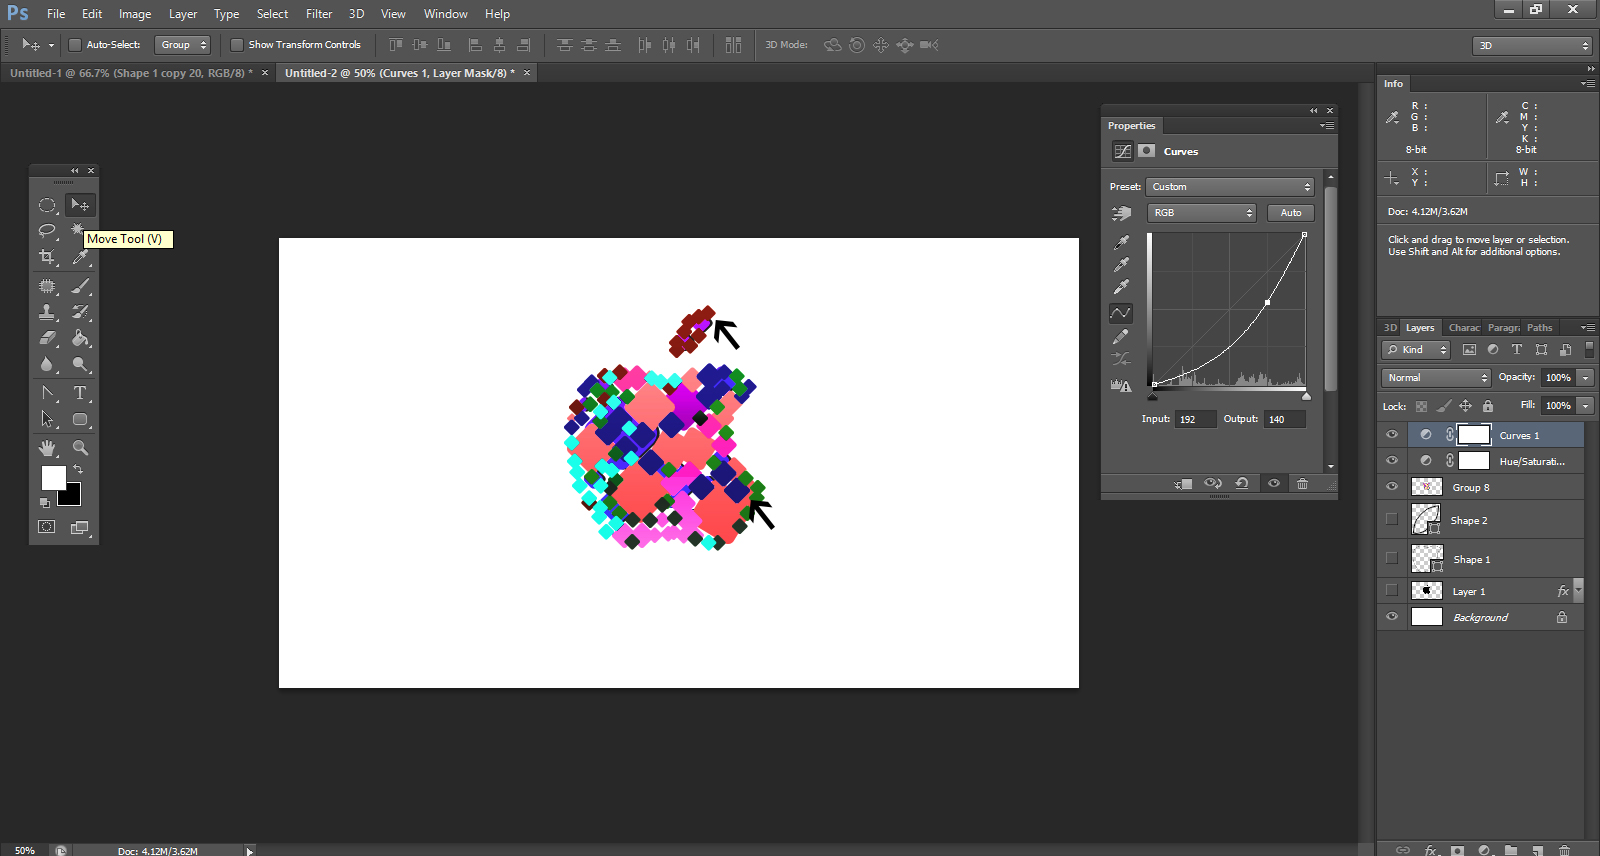
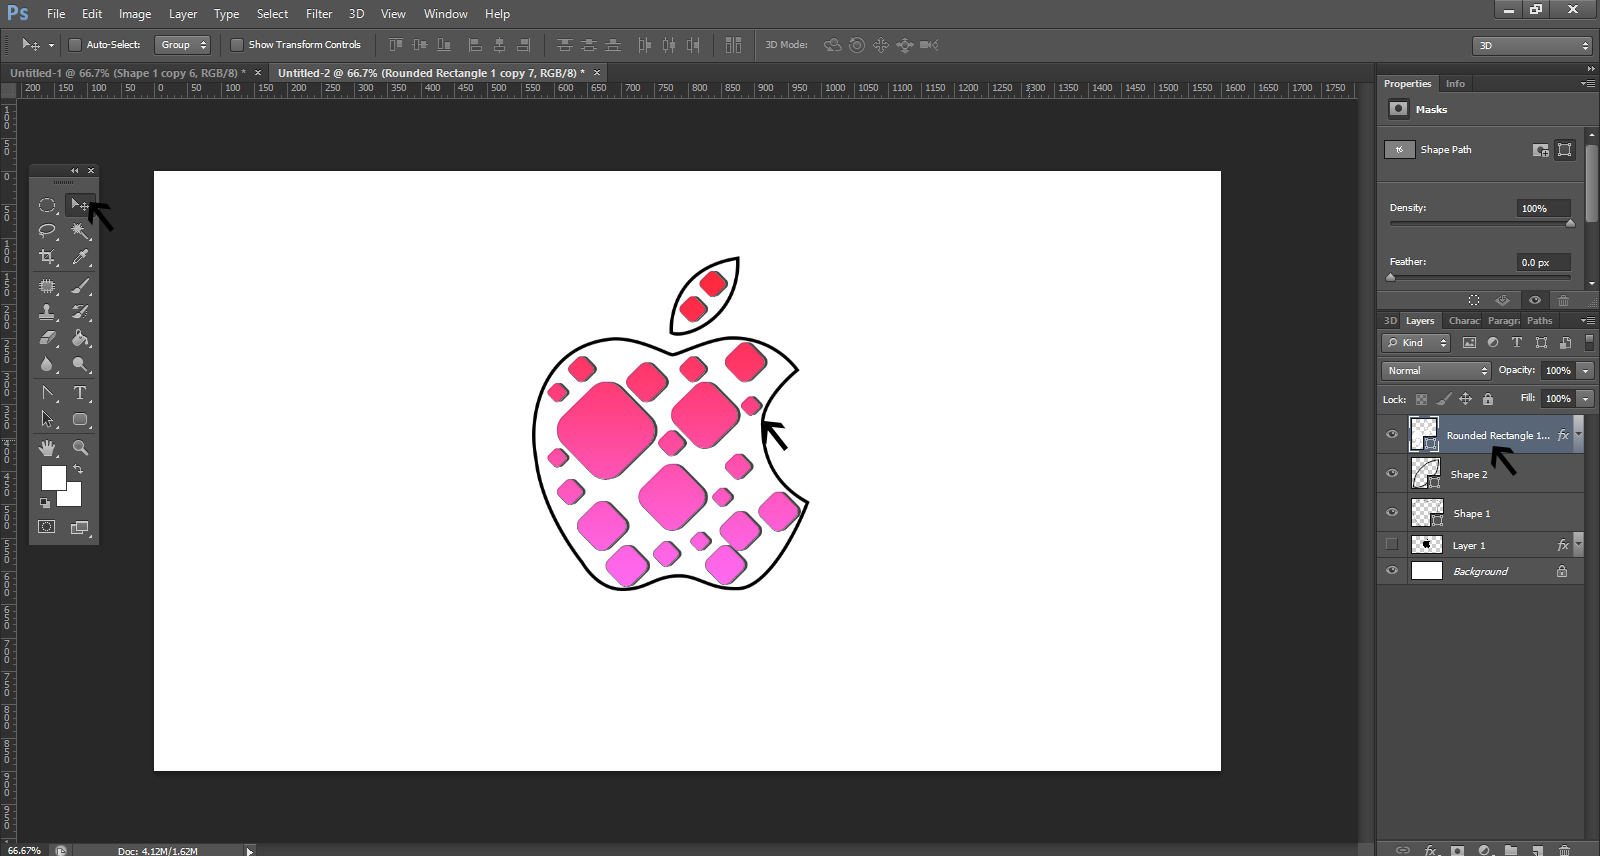
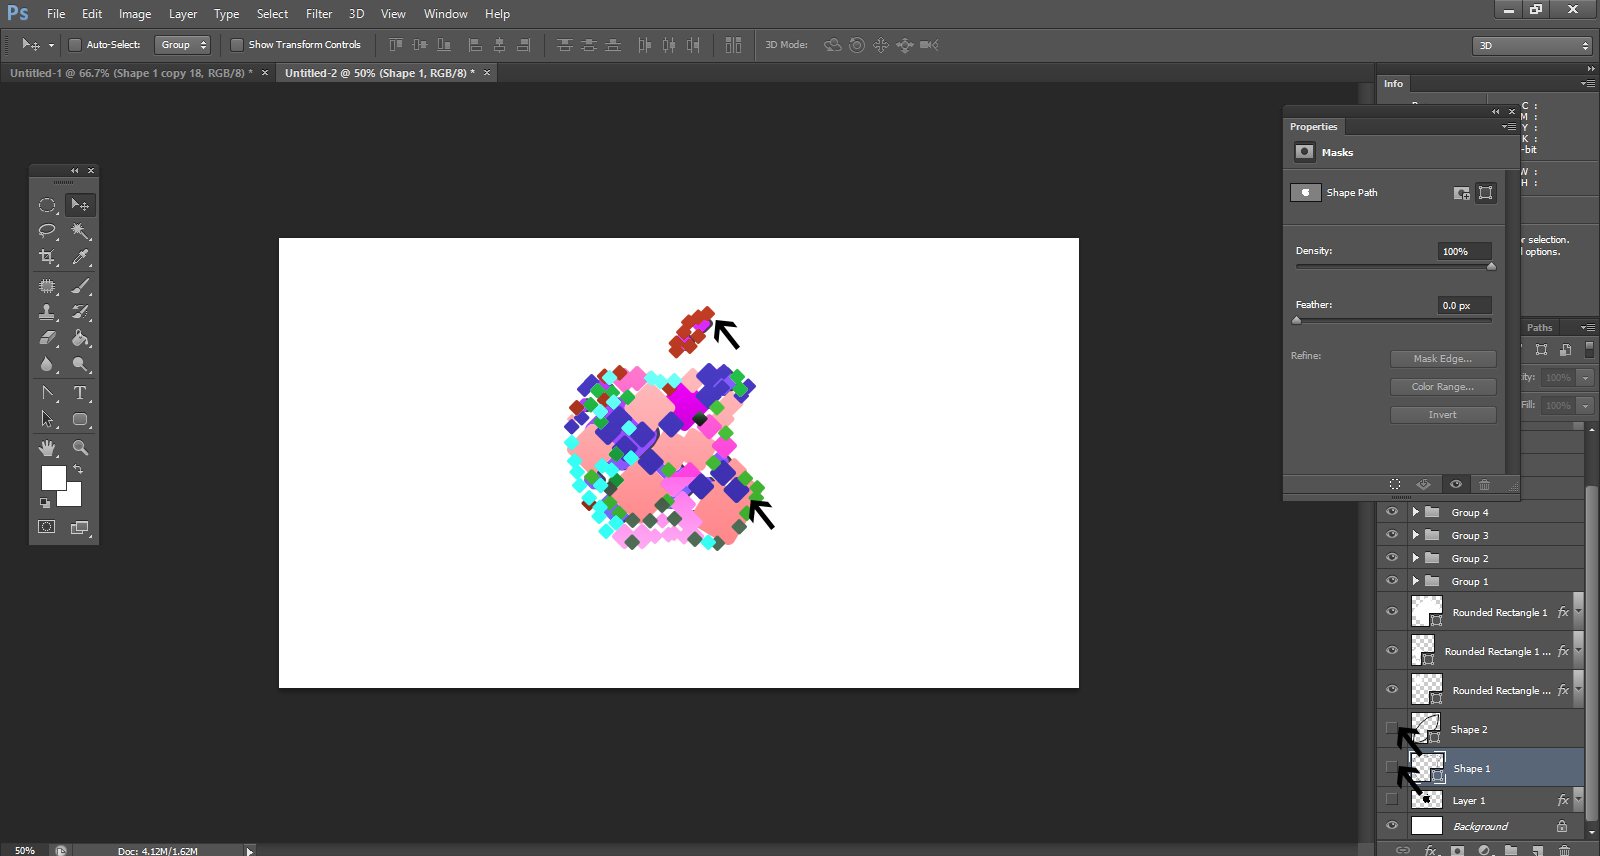
Step-14
Use Masks in Properties to further mix the square in different smaller shapes.
Step-15
Now, as a final step, remove the layer that contains the logo’s contours. You should click on Create new fill or Adjustment layer when you go to the Layers panel at the bottom. Click on the Curves and adjust the curve shape if you want to make some color corrections. You have the final image of the Apple logo.