Last updated on December 19th, 2022
If design software are superheroes, then Photoshop would be crowned as the Captain Marvel in these superheroes. Yes! Unlike many other complex software, Photoshop comes out with dominance because of its innovative features and quality results. So, being a designer, it’s necessary to persevere with this software to win over the designing world. Of course, in the beginning, it seems a tough task, but if you keep digging, you can master it, boost efficacy and efficiency in a short period. Therefore, we present the Top 10 Photoshop hacks that every graphic designer should know.
Here Are The Top 10 Photoshop Hacks
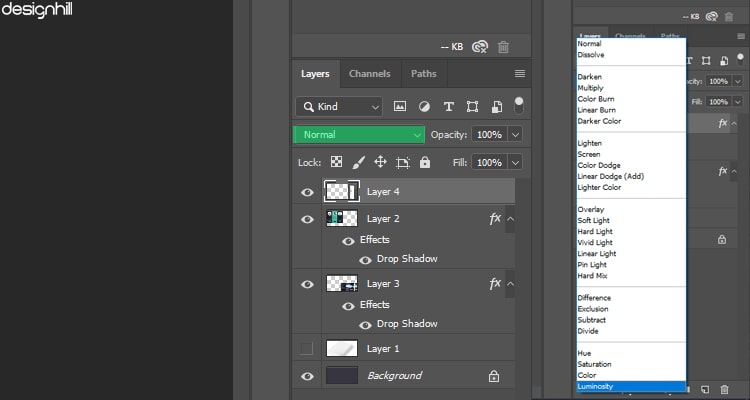
01. Practice To Increase Contrast Without Changing The Saturation
You must have noticed while using the curve adjustment layer to increase the contrast, the colors also get boosted. You should learn to avoid it. How? It can be easily avoided by changing the blending mode of curves from ‘Normal’ to ‘Luminosity’. By practicing this, the curve layer will affect only the contrast in the image without making any changes in the saturation.
02. Try To Match Layer Color
Sticking to specific color schemes is required by plenty of graphic design tasks. As in where some even need to extend the focus part vector shapes to regular raster inserts. But playing with color consistency can be annoying, especially when you are dealing with product based pictures. To overcome this, designers can try 2 things: first, apply colored overlays set to Hue or Color that can obscure a lot of important details.
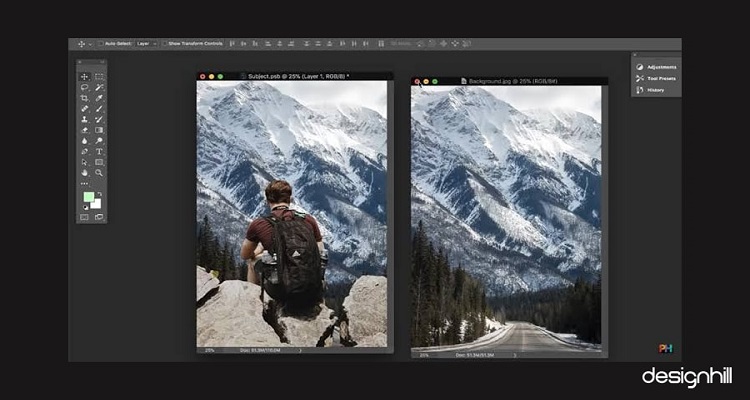
The second way is to stack images as separate layers, pick out one that has colors you like, use Image->Adjustments->Match Color . Now, pick the source name of the file and pick that preferred layer in Layer. You can also create a great piece of work by bringing two images with wildly-different lighting and coloring closer together.
Looking For a Photoshop Design?
We have helped thousands of business owners from all around the world with their graphic design needs such as Photoshop design, logo design, website design, social media posts, banner design and much more.
Get Your Photoshop Design Get a Free Quote
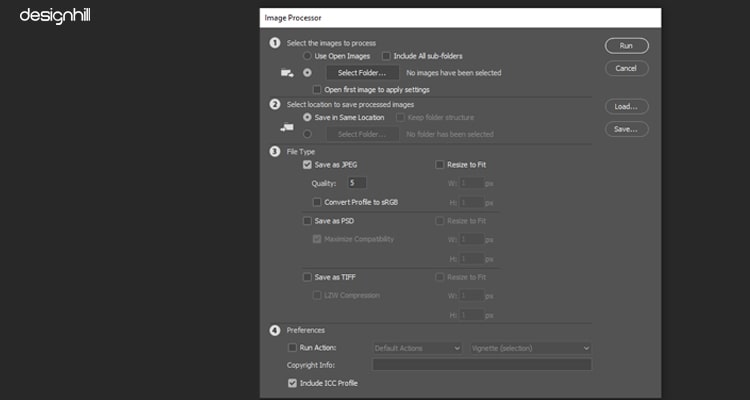
03. Use Batch Processing To Edit Multiple Photos
Batch processing is the best way to do when you need to resize several photos or to perform an action on all of them. All you need to make sure that all the pictures are in the same folder. Then you need to go to File–Scripts–Image Processor and select the necessary criteria. The best of Photoshop is that it hardly takes a few seconds to process all the images at one shot.
04. Use Another Image As A Texture
Texture is mainly used to generate more details.
In Photoshop, open both the images in separate windows. Select one image that will be used as a texture image and desaturate it by going to Image-Adjustments-Desaturate. The copy and paste the image over your base image by pressing to Cmd / Ctrl + A and Cmd / Ctrl + C to select and copy the whole image.
While doing this, make sure the image is flattened. Then go to other image and press Ctrl + V, the texted imaged will get added as a new layer. Then, you can use your creative style and play around with the blending mode for this layer to blend it with the base image. Most of the time, ‘Overlays’ and ‘ Soft Light ’ blending modes are appreciated to work as the best.
05. Learn To Auto-Select Layers
This is one of the important photoshop hacks that generally helps when you get to work like 30 layers deep into a complex design. During the time, you start losing track of which layers feature the shapes you’re to trying to move. This can turn very frustrating like going through every layer, hiding and unhiding to see what next happens.
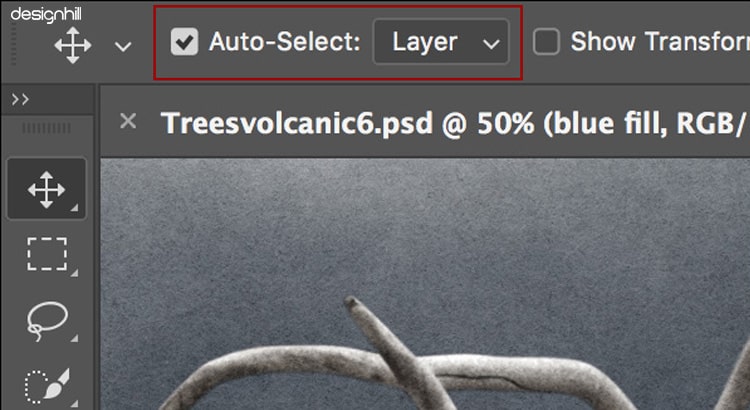
Generally, software like Photoshop has an auto-select option that can be easily seen in the main options tool bar when you select the ‘Move’ tool. Software will automatically select whichever layer is responsible for that pixel.
06. Remove Or Add Distortion And Vignette
Distortion refers to a rounded effect in an image mostly caused by diminished lens magnification towards the edges. Where Vignette is common in optics and photography which is also known as “light fall-off” that defines darkening of image corners when compared to the center. The change in the distortion or vignetting in the image can be handled with The Lens Correction option available under the Filters Tab.
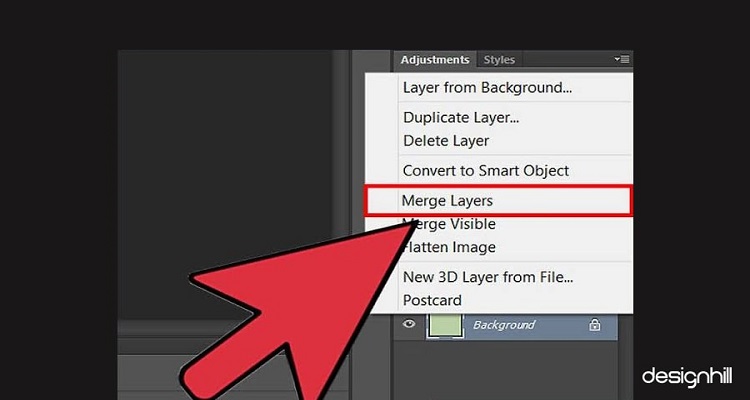
07. Merge All Layers
This is the best Photoshop hacks if you want to preserve all the layers yet merge them into a new layer. Use, Cmd / Ctrl + Shift + Alt / Opt + E . This hack will enable you to work with multiple adjustment layers and still have all the layers intact.
08. Hide Cropped Area And Change It later
This seems a minor setting but it often happens when you crop an image and make adjustments, later find out that the crop doesn’t work well. Then for making changes, again you need to follow the same process. This can be avoided by hiding the cropped area instead of deleting it.
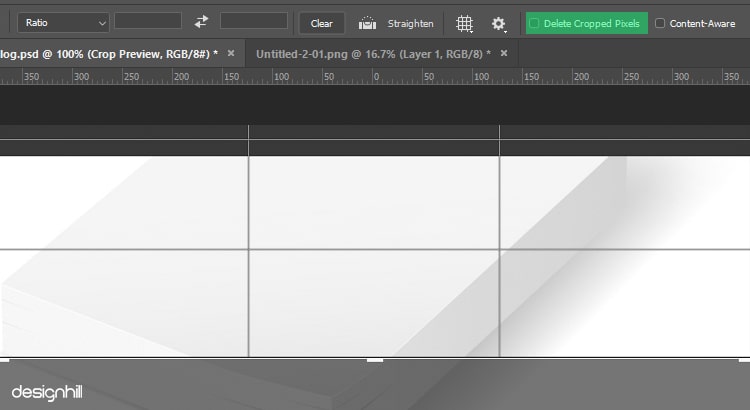
Create a duplicate layer to crop the image. Select the crop tool, select ‘ Hide ’ for the ‘ Cropped Area ’ option at the top. Once you have cropped the image, you will find that you can move the image within the cropped area.
09. Use Warp Tool To Straighten Crooked Lines
Warp Tool is yet another tool that gives you great control over the perspective of the image. Once you select Wrap option from ‘Transform’ in Edit bar, you get 12 adjustment points around the edges of the images. It will let you correct perspective errors such as straightening crooked and bent lines.

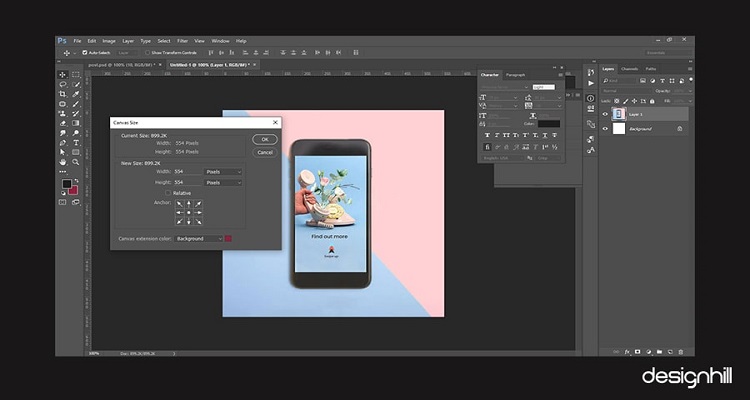
10. Create Customisable Borders
Increasing the canvas size is the ideal way to create borders is another set of photoshop hacks. And, the best part, it’s customizable. All you need is to press Cmd / Ctrl + Opt / Alt + C to open the dialog box. Select ‘ Relative ’ checkbox, then type height and width of the border as per your wish. The ‘ Anchor ’ option lets you adjust the border’s position.
TakeAway
Today, using Photoshop design has become the necessary skillset for every designer. And, they pick up different ways of doing various tasks on the software. It’s just a matter of being open to trying new methods or functions and getting innovative with various styles. Remember, there is always something new to learn in designing industry, all you need is to grab the tips and start practicing. No matter how long, you are using Photoshop, there’s always something new.